

- Official docs: docs.openwebui.com/getting-started/quick-start
- Deployment method: Docker Compose
Prerequisites
1
Prepare MixRoute credentials
- Obtain your MixRoute API endpoint URL:
https://api.mixroute.ai/v1 - Generate your API Key in the MixRoute console.
- Confirm the model name you want to use, e.g.
gpt-5.5(make sure this model is enabled in the MixRoute console).
2
Environment dependency check
Make sure Docker (including Docker Compose V2) is installed on your machine or server. Run in a terminal:If both commands return a version number, your environment is ready. If Docker is not installed, go to the Docker website to download and install Docker Desktop (Windows/macOS) or Docker Engine (Linux), then re-run the commands above to confirm.
Deploy OpenWebUI
1. Create a dedicated folder
Open a terminal and run the following commands to create anopenwebui folder and enter it:
2. Create docker-compose.yml
Inside theopenwebui folder, create a file named docker-compose.yml with the following content (copy and paste the full file):
If you run Open WebUI on a server or within a LAN, you can add the
WEBUI_SECRET_KEY and WEBUI_URL environment variables:WEBUI_SECRET_KEY: generate one withopenssl rand -hex 32.WEBUI_URL: your public IP or domain.
"3000:8080" to e.g. "3010:8080" and access the UI at http://localhost:3010.3. Start the service
From the directory containingdocker-compose.yml, run:
up: start the service-d: run in the background
Container open-webui Started, the service has started successfully.
Check the running status:
STATUS column shows Up, the service is running normally.
Access and initialize your account
1
Open the web UI
Open a browser and go to
http://localhost:3000.If deployed on a remote server, replace localhost with the server IP, e.g. http://SERVER_IP:3000.2
Register the first account
On first launch you’ll see the registration page. Fill in the form to register.
3
Subsequent user approval
Any accounts registered afterwards start in the “Pending” state by default. An administrator must log in to the admin panel and manually approve them before they can use the UI.
Connect to MixRoute
Open WebUI is only an interface on its own — you need to connect at least one model provider before you can chat. Open WebUI supports several model sources:
It’s recommended to connect through MixRoute — one configuration gives you access to 200+ popular AI models, with adequate privacy protection while staying easy to use.
1
Open settings
After logging in to Open WebUI, click your avatar in the bottom-left → Settings.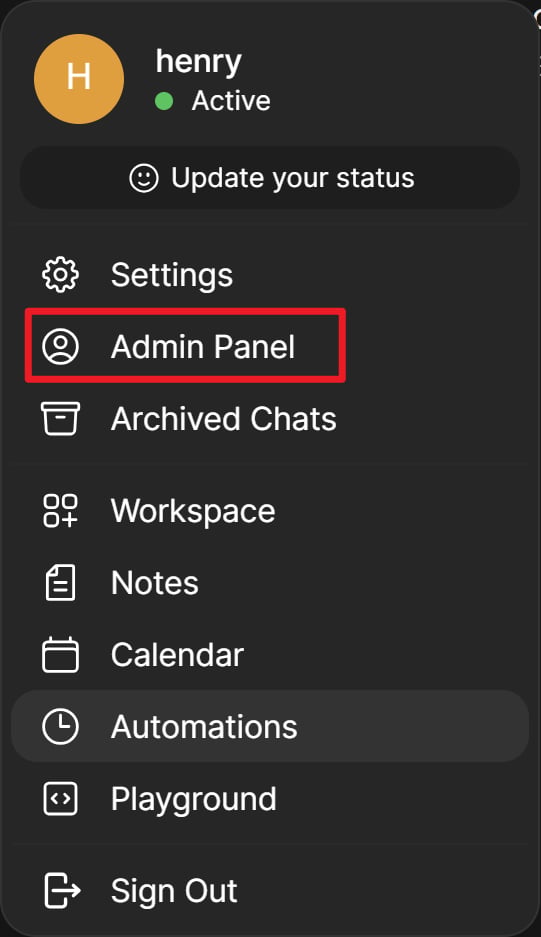
2
Open the connections panel
Go to Admin Settings → Connections.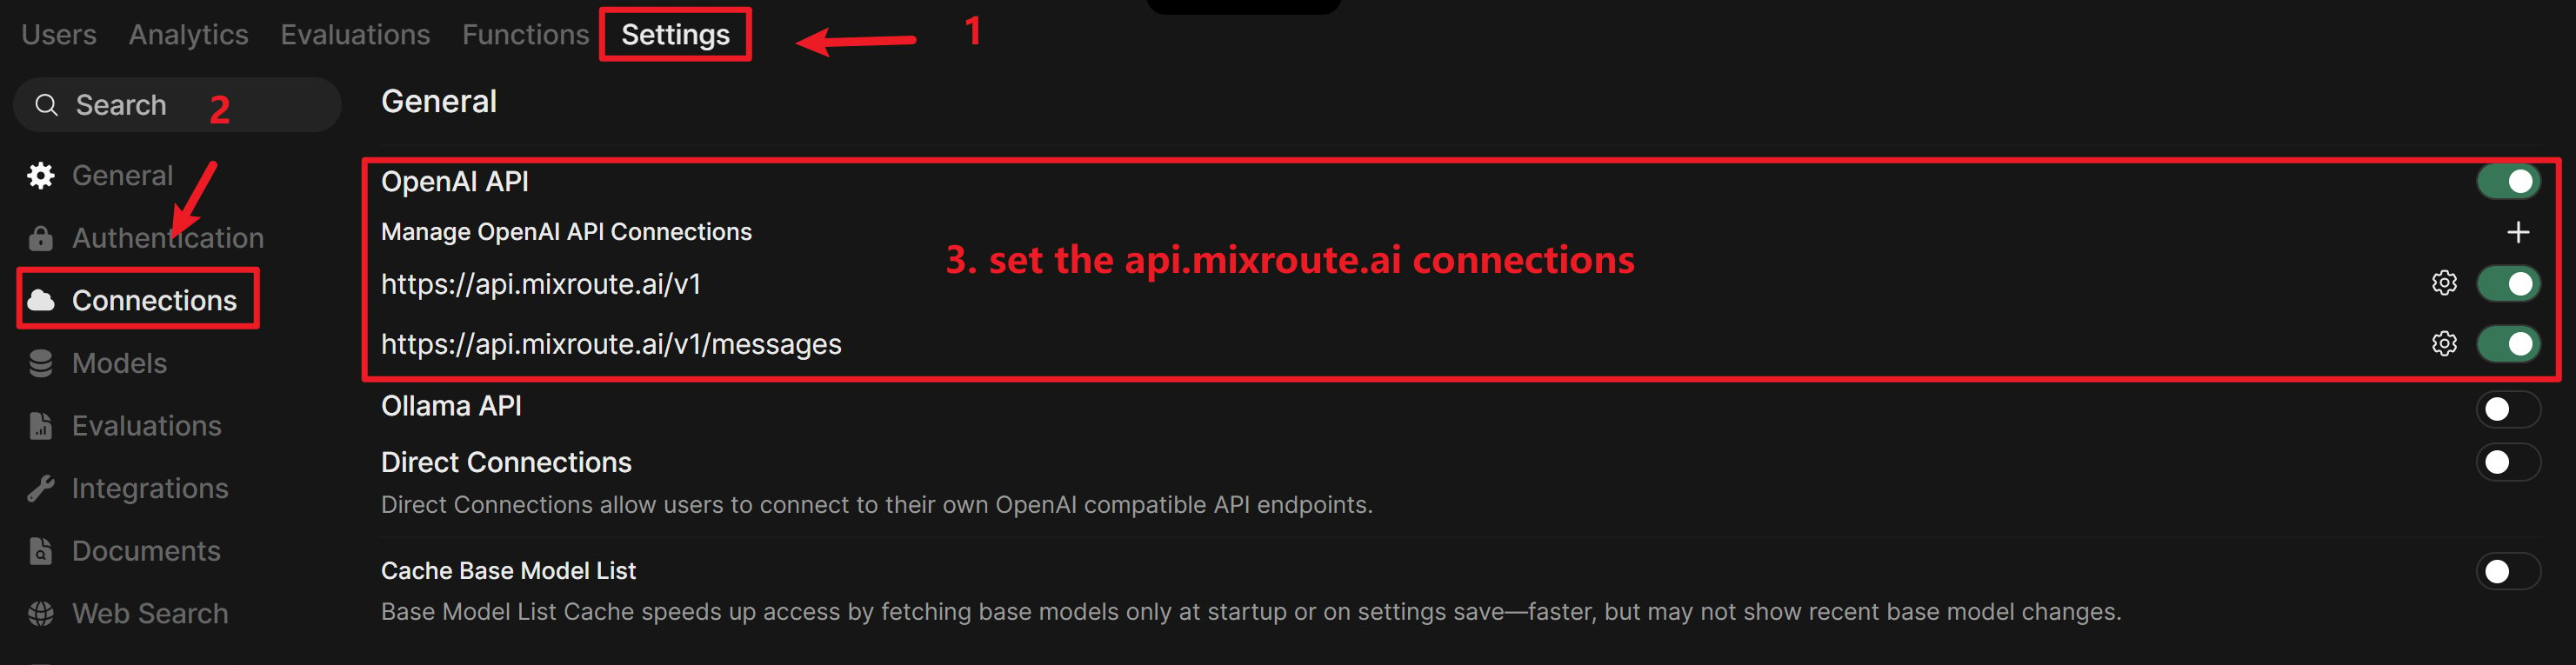
3
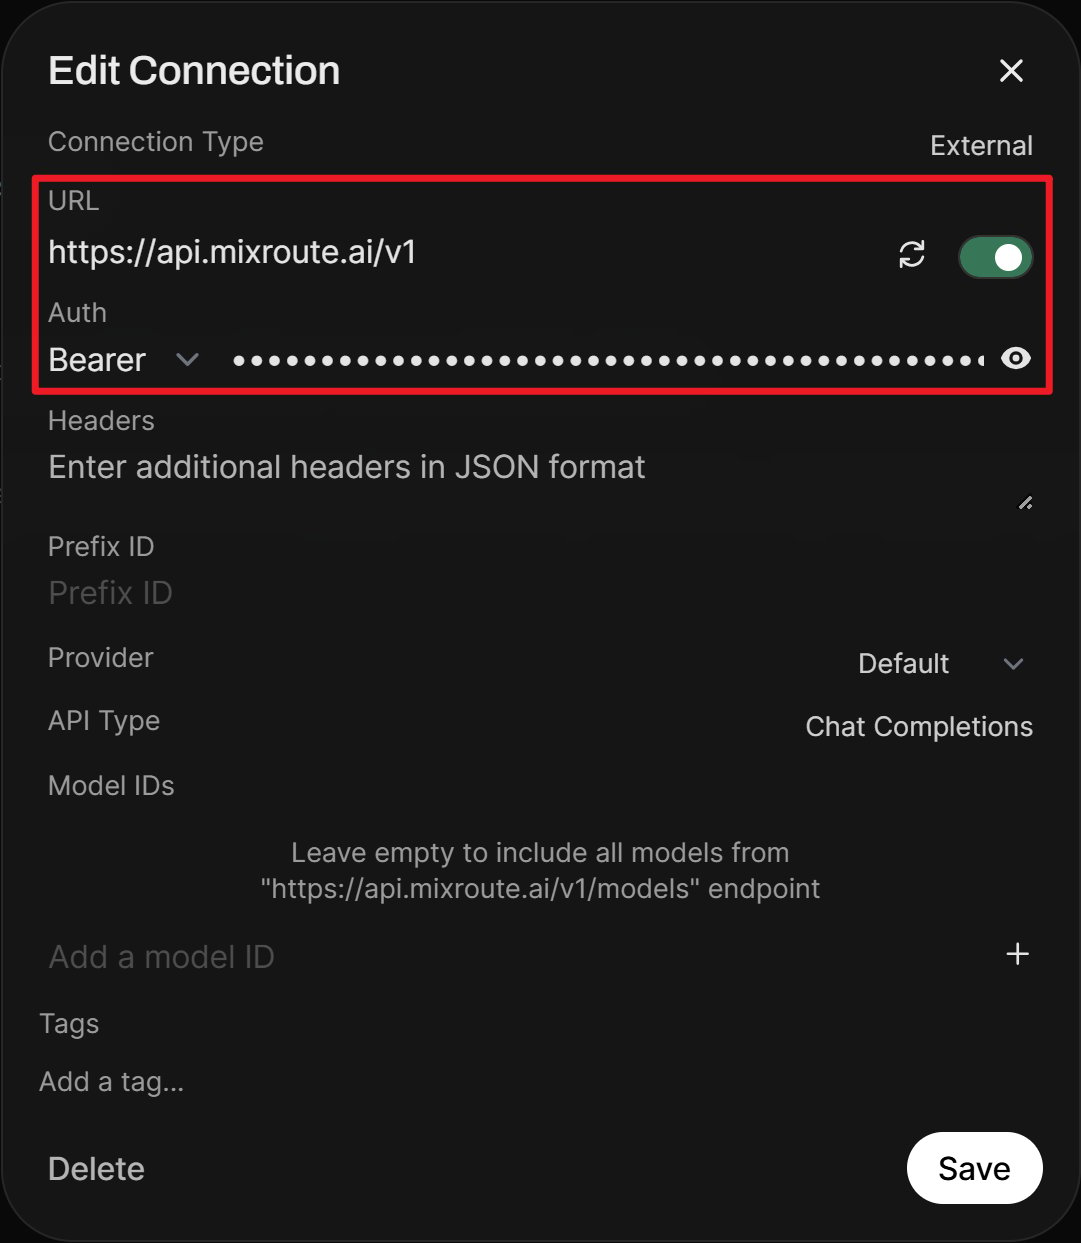
Enter MixRoute credentials
- Smart Routing Node
- Traditional API Node
Enter the Smart Routing node credentials: fill in the Base URL and Smart Routing API Key, then save.
- Base URL:
https://api.mixroute.ai/v1 - API Key: your Smart Routing API Key (e.g.
sk-xxxxxxxx) - Model ID: select auto
See the Smart Routing documentation for constraints and how to obtain credentials.
4
Pick a model and start chatting
Back on the main screen, the newly connected model appears in the model picker. Select it to start chatting.
Common maintenance
Stop the service
Start the service again
View logs (for troubleshooting)
Update to the latest version
pull fetches the latest image, and up -d recreates the container with the new image. Your data is safe — it lives in volumes, separate from the container itself.Full uninstall
Stop and remove the container only (data is preserved, so you can recover withup -d at any time):
FAQ
Can't open http://localhost:3000 in the browser?
Can't open http://localhost:3000 in the browser?
- Confirm the container is running:
docker compose ps, and check thatSTATUSisUp. - Confirm the port isn’t already in use by another program. If it is, change the port in
docker-compose.ymland rundocker compose up -dagain.
Forgot the admin password?
Forgot the admin password?
You can reset the password in Settings. If you can’t log in at all, it needs to be handled at the database level — we recommend asking for help in the Discord/GitHub community first, and avoiding deleting the data volume directly (that would lose all data).
How do changes to docker-compose.yml take effect?
How do changes to docker-compose.yml take effect?
After saving the file, from the same directory run:Docker Compose detects the changes automatically and recreates the container.
Once configured, every Open WebUI conversation and capability is powered by the MixRoute endpoint you bound in Settings — you get a robust and highly cost-effective cloud LLM service.