> ## Documentation Index
> Fetch the complete documentation index at: https://docs.mixroute.ai/llms.txt
> Use this file to discover all available pages before exploring further.
# LobeHub
> LobeHubでMixRoute APIキーを使用する
## LobeHubでMixRoute APIを使用
このガイドでは、LobeHubで公式のOpenAIキーの代わりに**MixRoute API**(OpenAI互換)を使用する方法を説明します。
## ステップ1:MixRouteのAPIキーを取得
1. [MixRouteアカウント](https://api.mixroute.ai/)を登録し、基本設定を完了します。
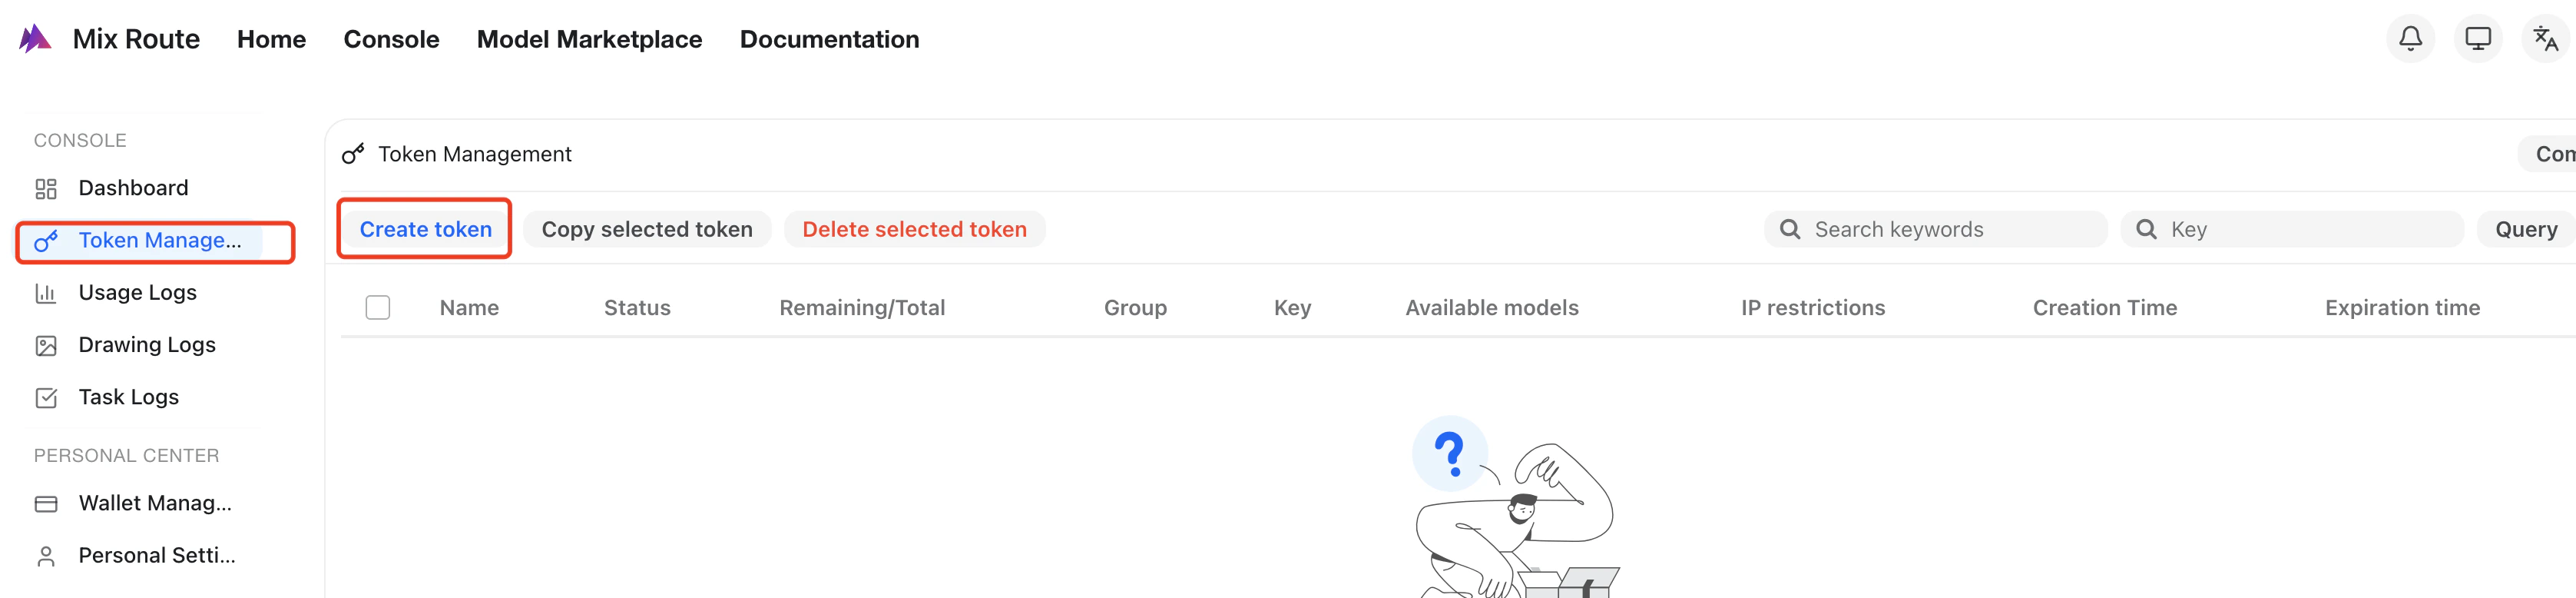
2. コンソールで**APIキー**ページに移動し、`Create new key`をクリックします。
 3. ポップアップダイアログでキーの名前を入力し、作成してください。
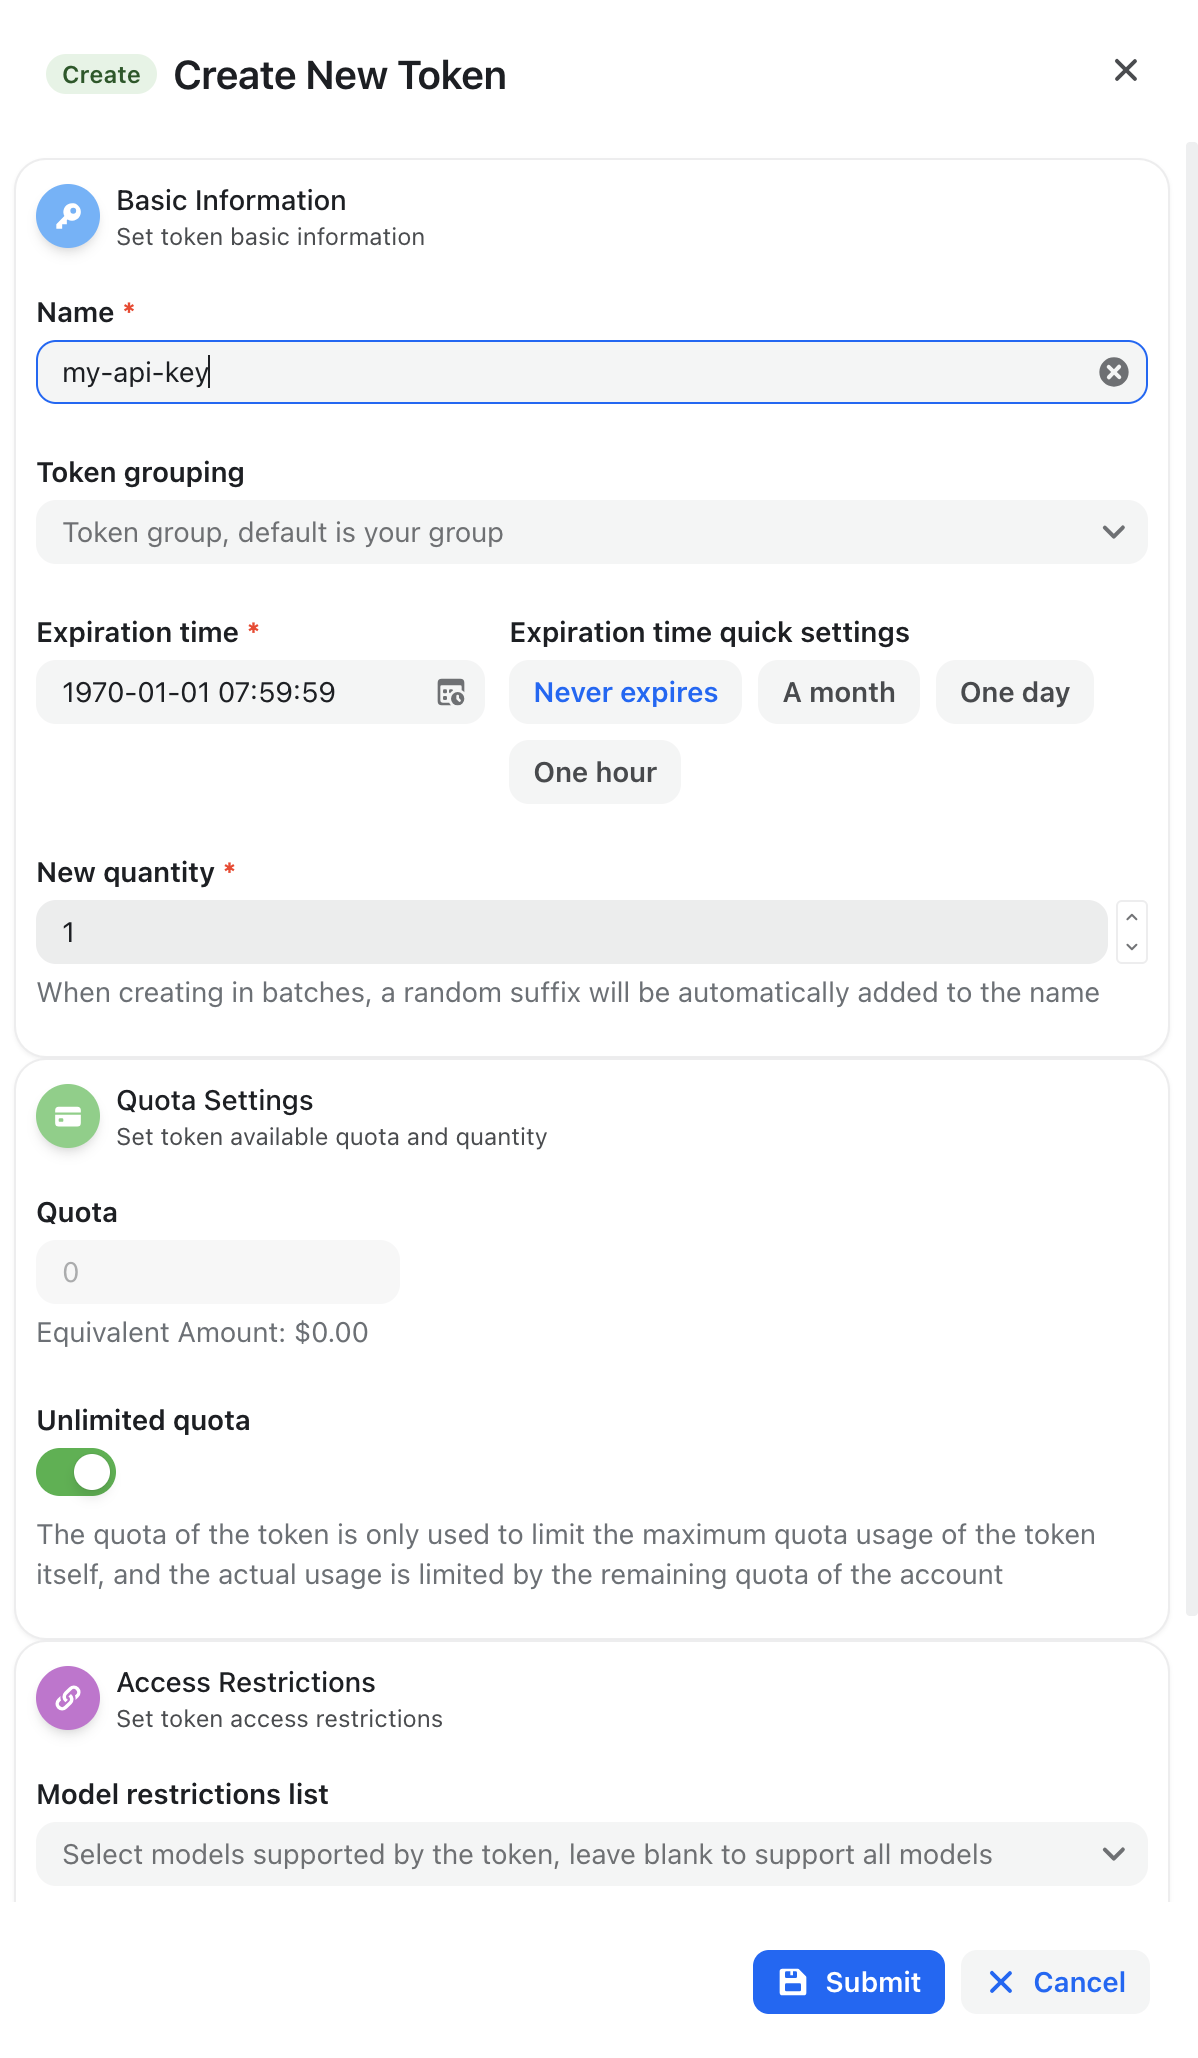 4. 生成されたAPIキーをコピーし、安全に保管してください。
 セキュリティ上の理由から、キー全体は通常1回しか表示されません。紛失した場合は、コンソールで新しいキーを生成してください。
## ステップ2:LobeHubでMixRouteを設定
1. LobeHubを開き、**設定**ページに移動します。
2. **AIプロバイダー**の下で、**OpenAI / カスタムOpenAI互換プロバイダー**のセクションを探します。
3. プロバイダー設定に、次の内容を入力してください。
セキュリティ上の理由から、キー全体は通常1回しか表示されません。紛失した場合は、コンソールで新しいキーを生成してください。
## ステップ2:LobeHubでMixRouteを設定
1. LobeHubを開き、**設定**ページに移動します。
2. **AIプロバイダー**の下で、**OpenAI / カスタムOpenAI互換プロバイダー**のセクションを探します。
3. プロバイダー設定に、次の内容を入力してください。
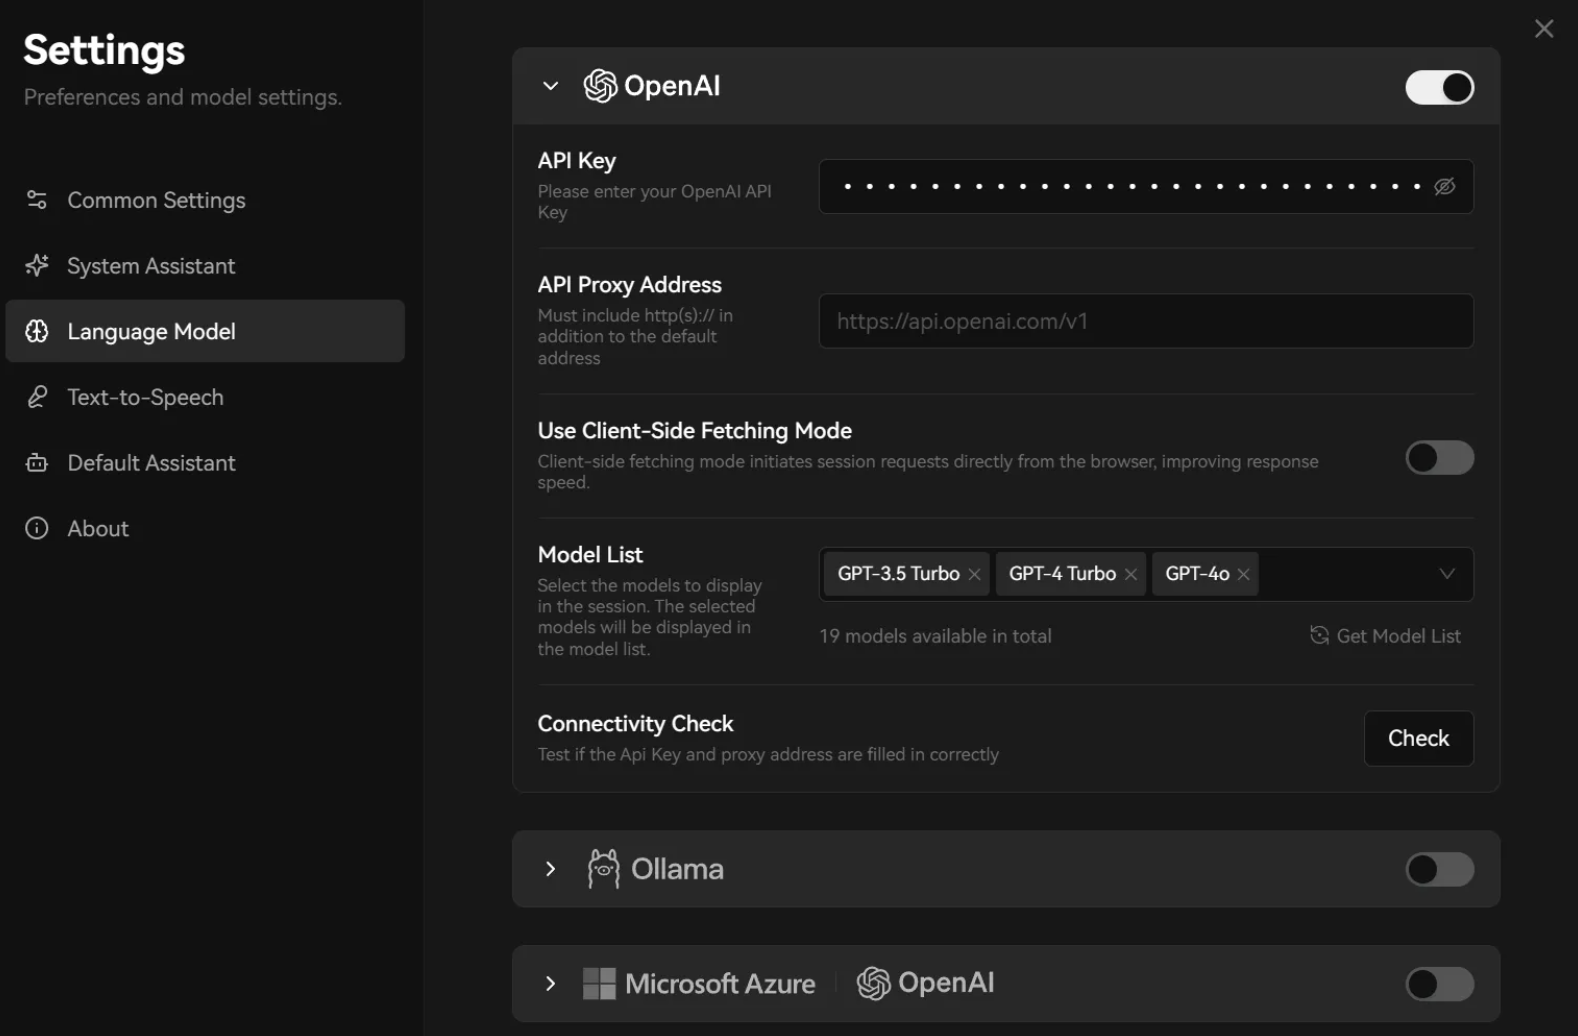 プロバイダー設定に、次の内容を入力してください。
| フィールド | 値 |
| - | - |
| APIキー | MixRouteコンソールからコピーしたAPIキーを貼り付けます |
| Base URL / カスタムエンドポイント | `https://api.mixroute.ai/v1` |
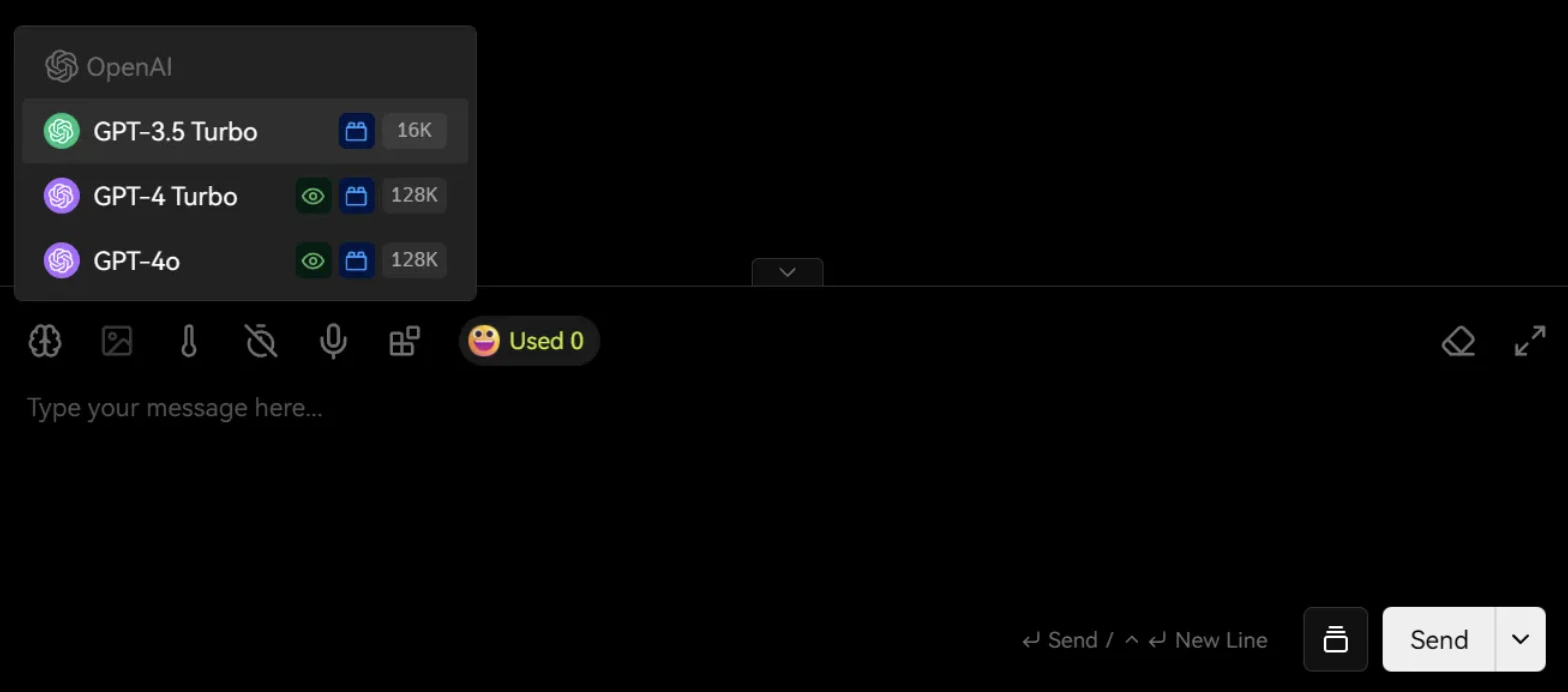
4. 設定を保存し、モデル一覧からMixRouteが提供するモデルを選択して、チャットを開始します。
プロバイダー設定に、次の内容を入力してください。
| フィールド | 値 |
| - | - |
| APIキー | MixRouteコンソールからコピーしたAPIキーを貼り付けます |
| Base URL / カスタムエンドポイント | `https://api.mixroute.ai/v1` |
4. 設定を保存し、モデル一覧からMixRouteが提供するモデルを選択して、チャットを開始します。
 利用料金は、呼び出すモデルに基づいて計算されます。MixRouteコンソールの料金と使用量の情報を参照してください。
モデルと価格の完全な一覧は、[モデルリスト](https://console.mixroute.ai/models)を参照してください。
This documentation is built and hosted on [Mintlify](https://mintlify.com), a developer documentation platform.
利用料金は、呼び出すモデルに基づいて計算されます。MixRouteコンソールの料金と使用量の情報を参照してください。
モデルと価格の完全な一覧は、[モデルリスト](https://console.mixroute.ai/models)を参照してください。
This documentation is built and hosted on [Mintlify](https://mintlify.com), a developer documentation platform.