> ## Documentation Index
> Fetch the complete documentation index at: https://docs.mixroute.ai/llms.txt
> Use this file to discover all available pages before exploring further.
# Dify
> Difyプラットフォーム連携ガイド
## はじめに
Difyは、視覚的にAIアプリケーションを構築できるプラットフォームです。**MixRoute API**を使用すると、Difyで費用対効果の高いLLMサービスを利用できます。
## 連携手順
### ステップ1: APIアカウントを準備する
[https://api.mixroute.ai/](https://api.mixroute.ai/)で登録し、[クイックスタート](/ja/quickstart)を確認してください。
### ステップ2: Difyのモデルプロバイダー設定を開く
1. Difyプラットフォームを開き、設定に移動します
2. 左側のメニューで「モデルプロバイダー」を選択します
 ### ステップ3: 互換プラグインをインストールする
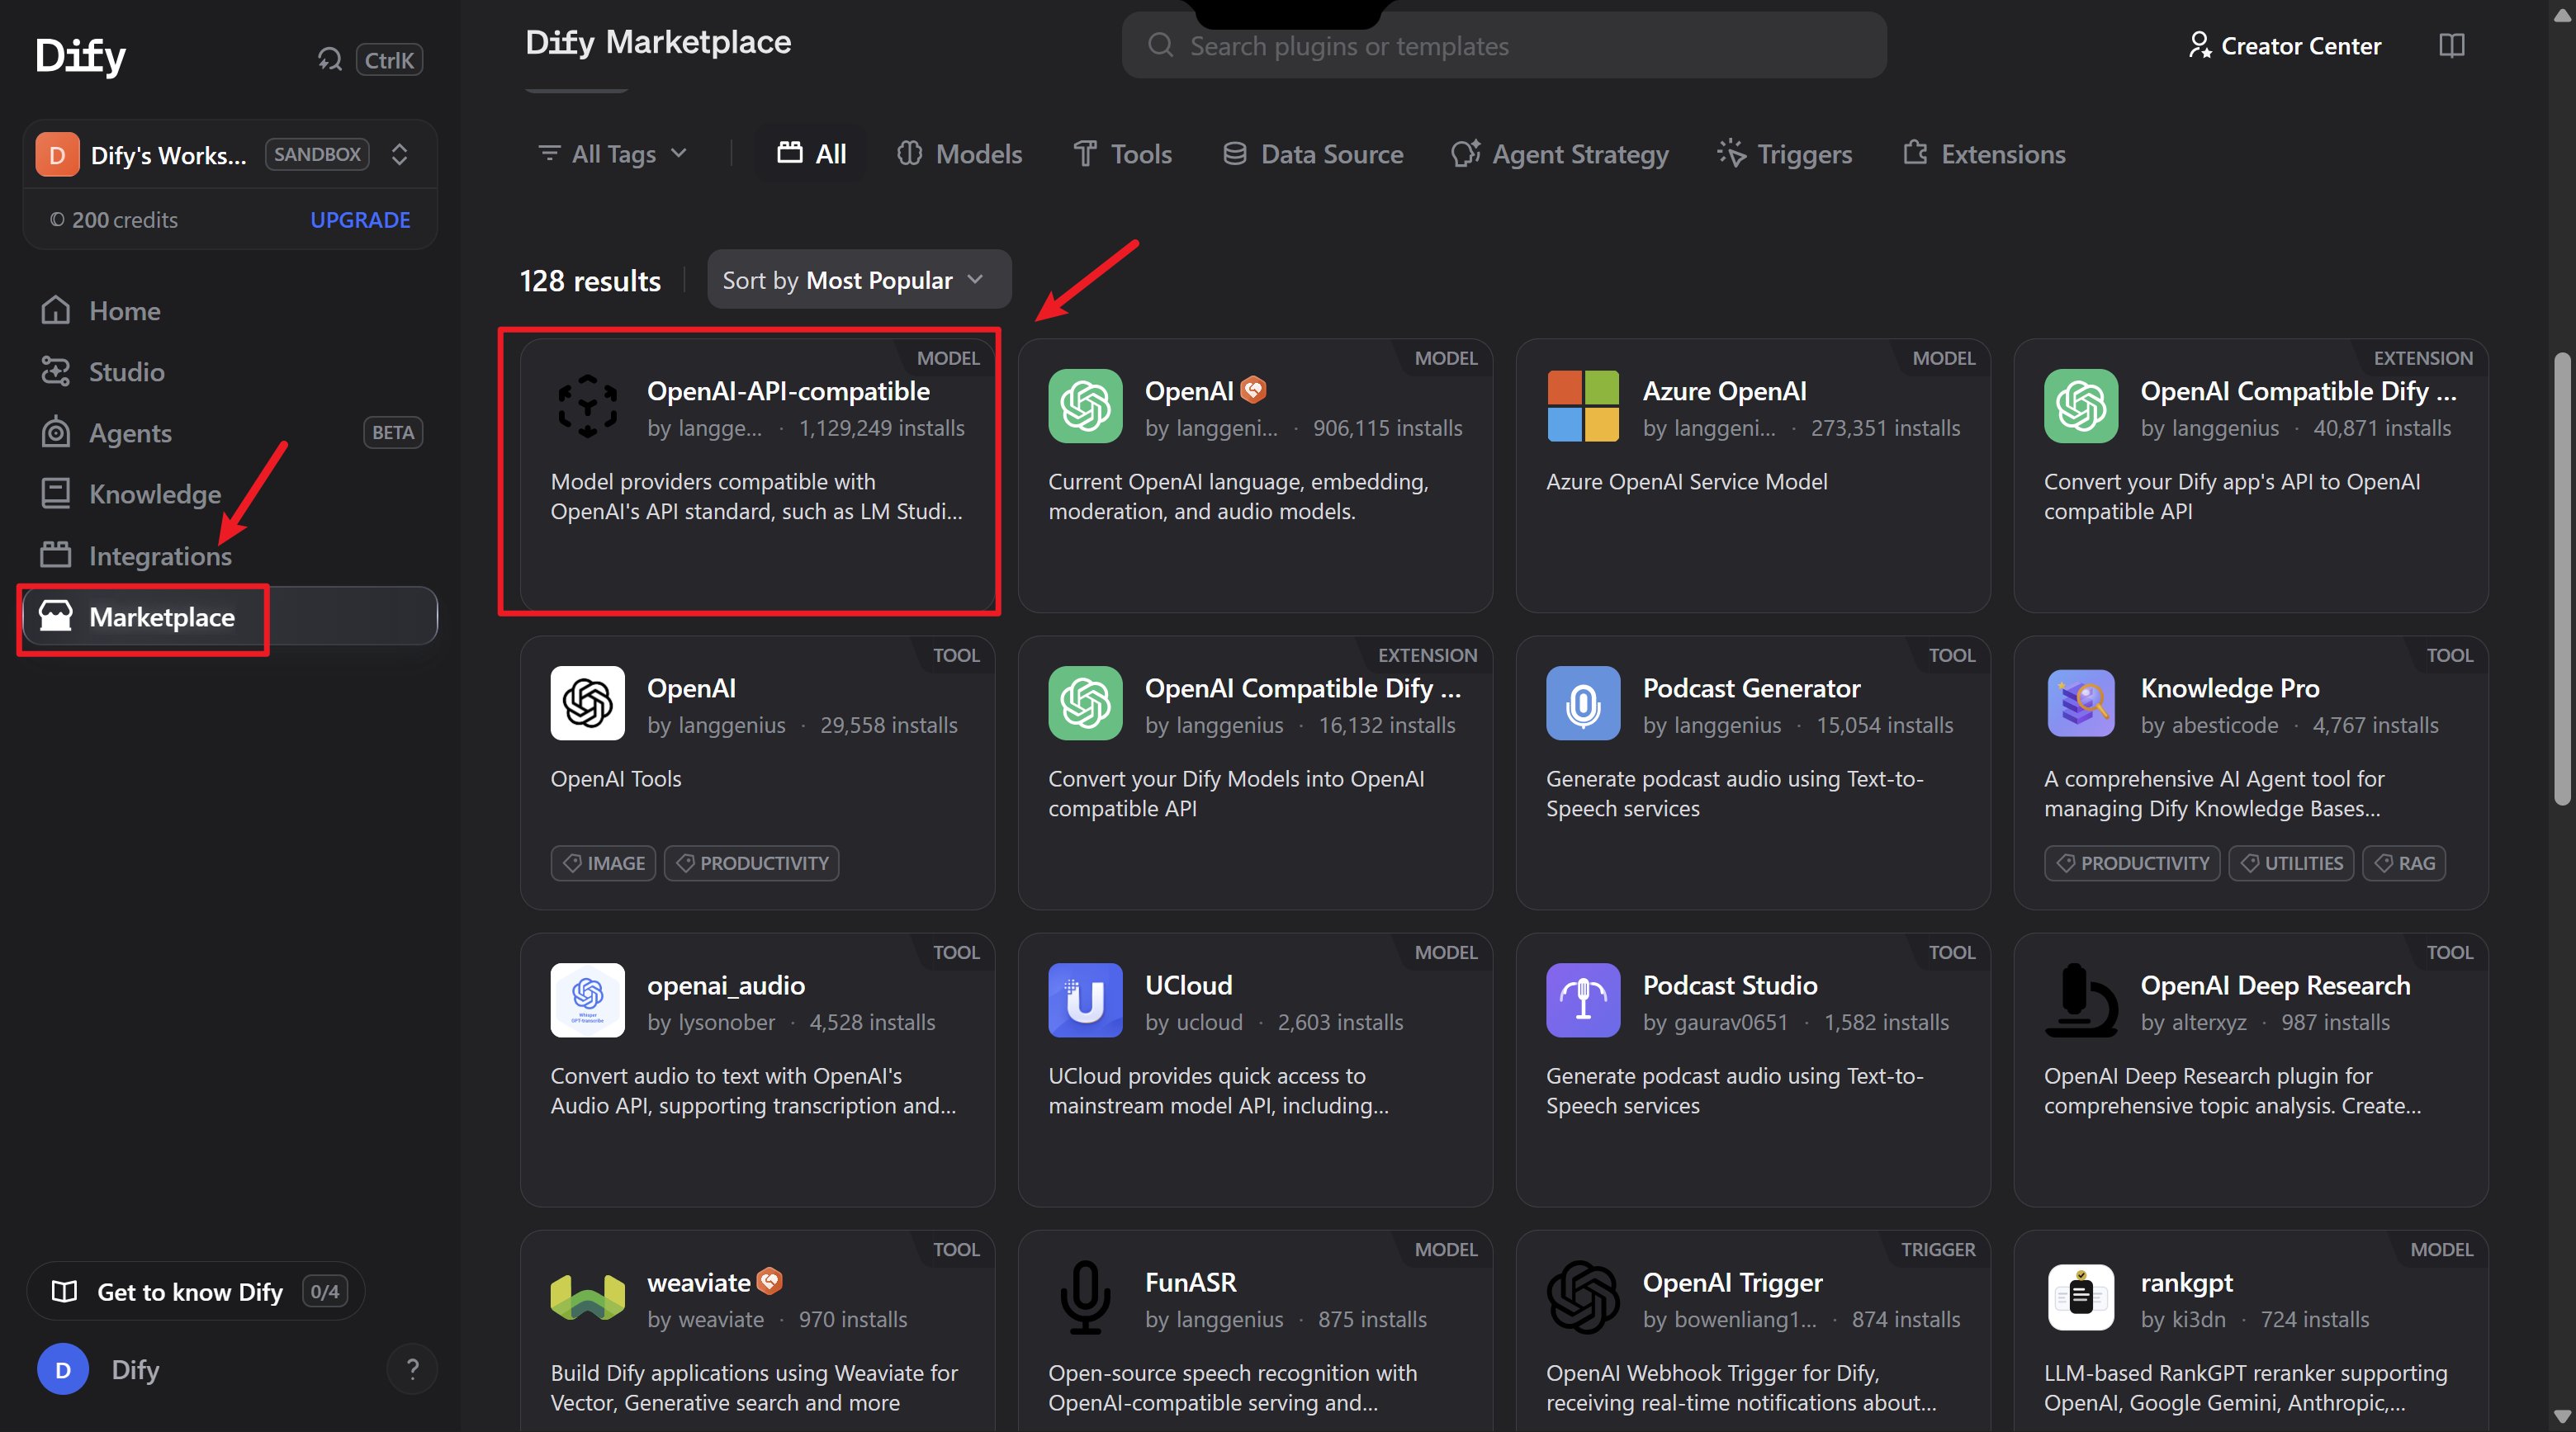
1. 「OpenAI-API-compatible」プラグインを探してください
2. 「インストール」をクリックします
### ステップ3: 互換プラグインをインストールする
1. 「OpenAI-API-compatible」プラグインを探してください
2. 「インストール」をクリックします
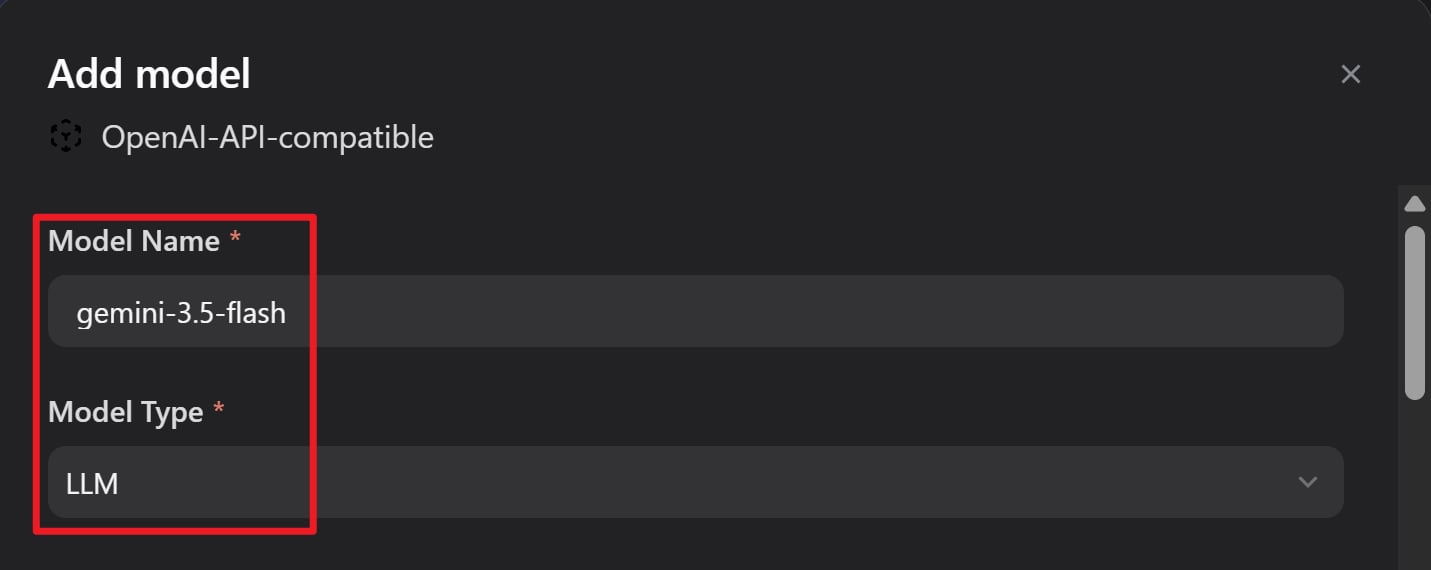
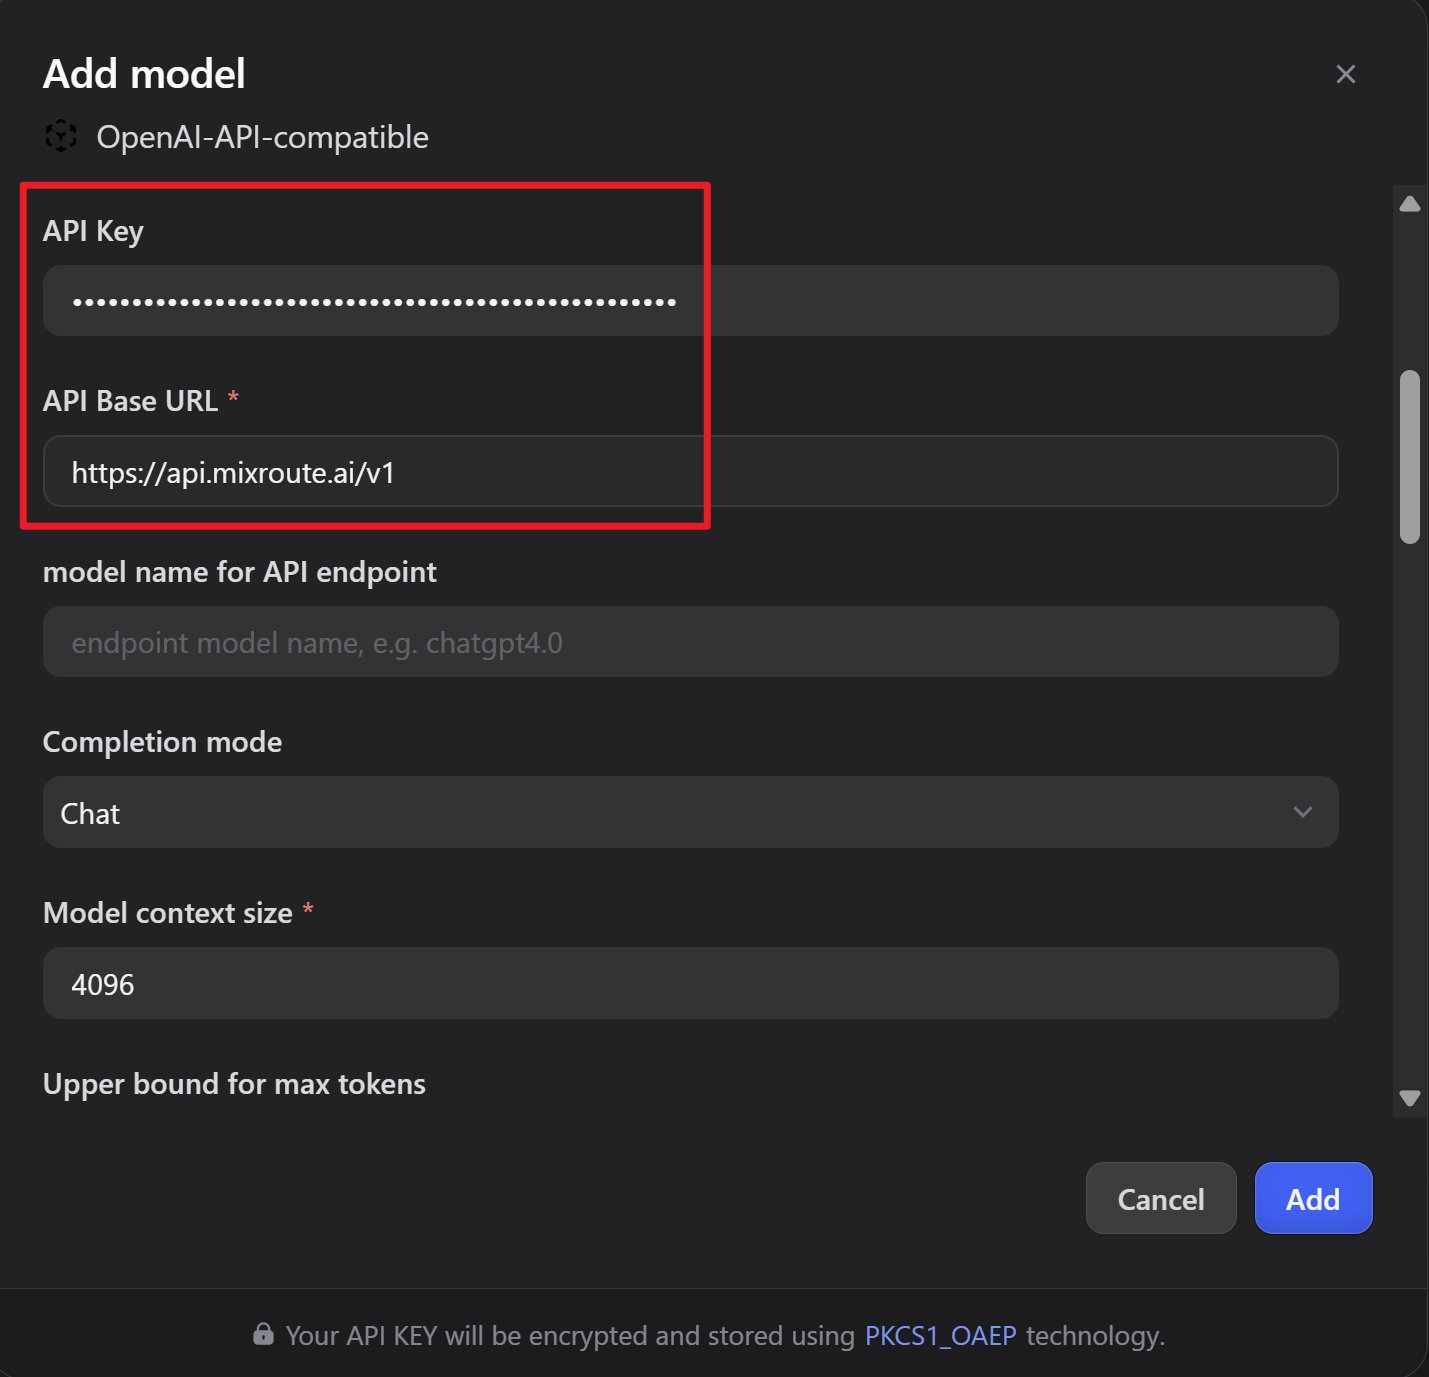
 ### ステップ4:パラメーターの設定
「モデルを追加」をクリックして設定します。
| 設定 | 値 |
| - | - |
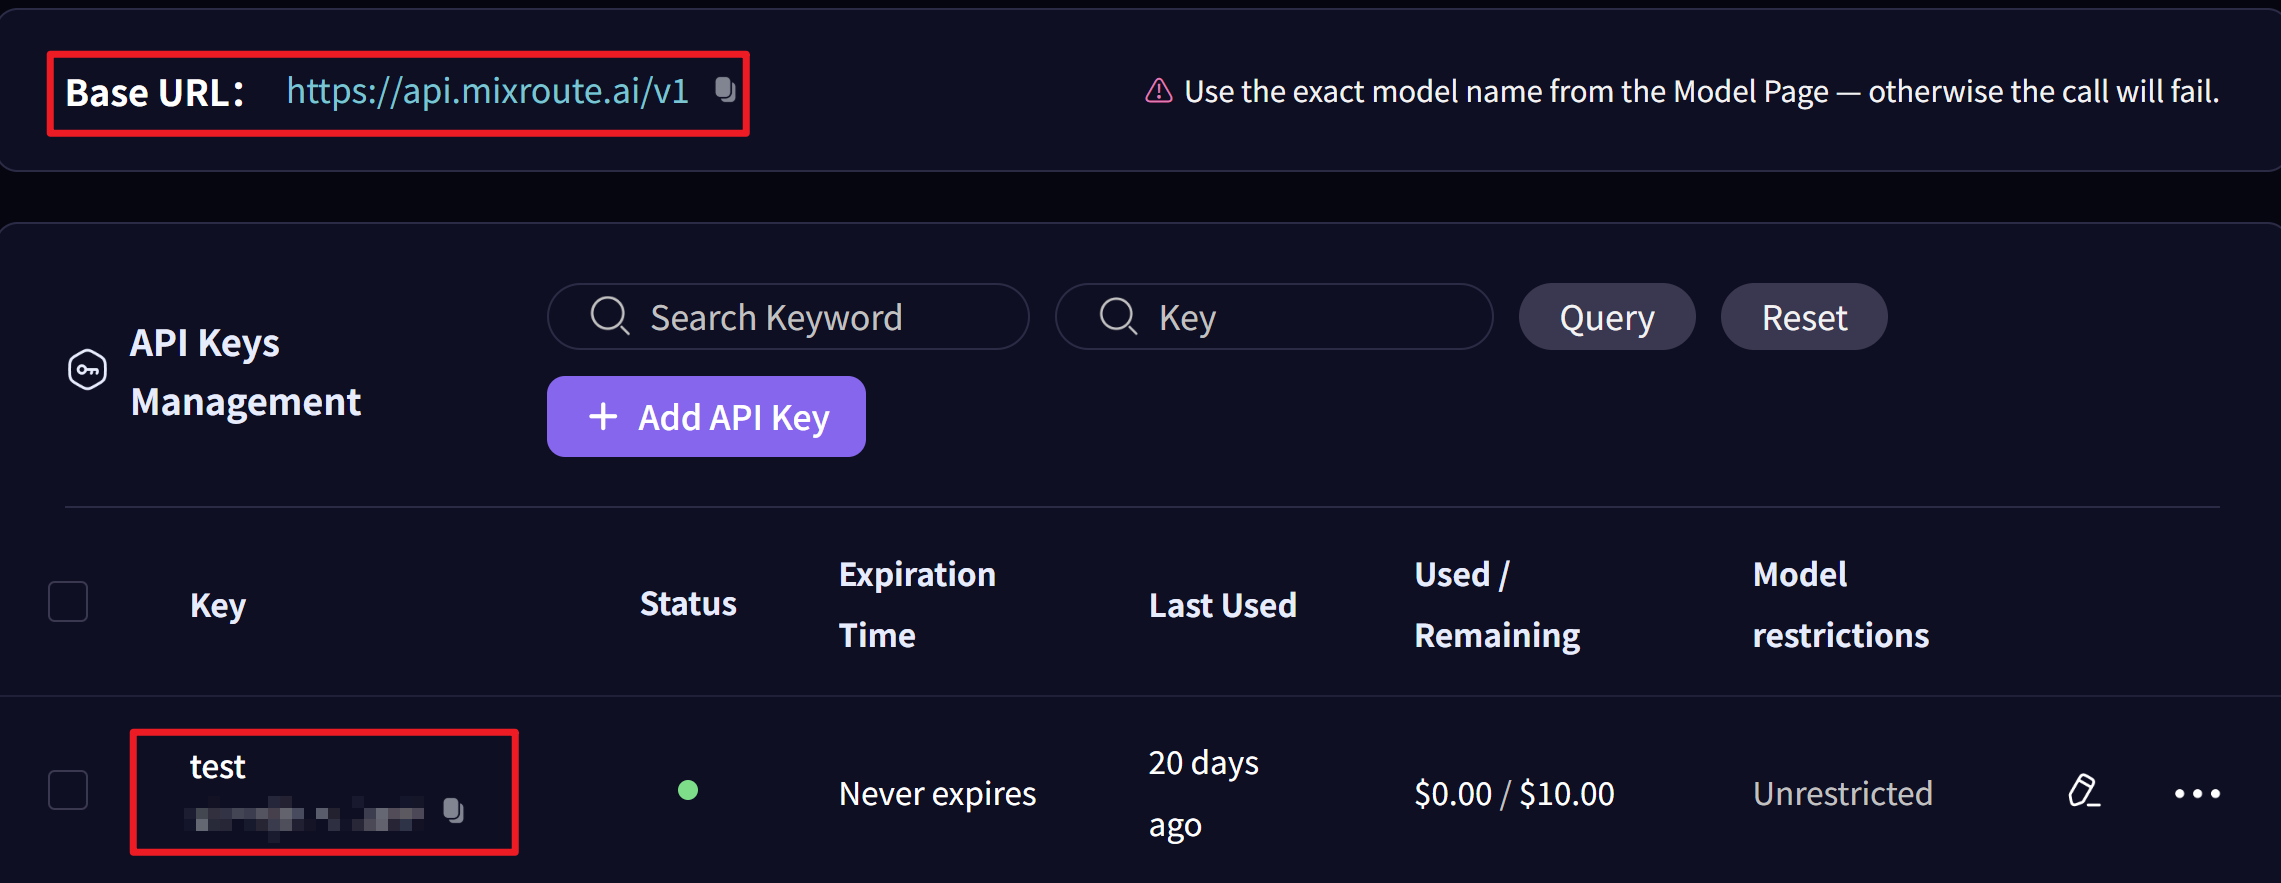
| APIキー | Mixroute APIコンソールから取得 |
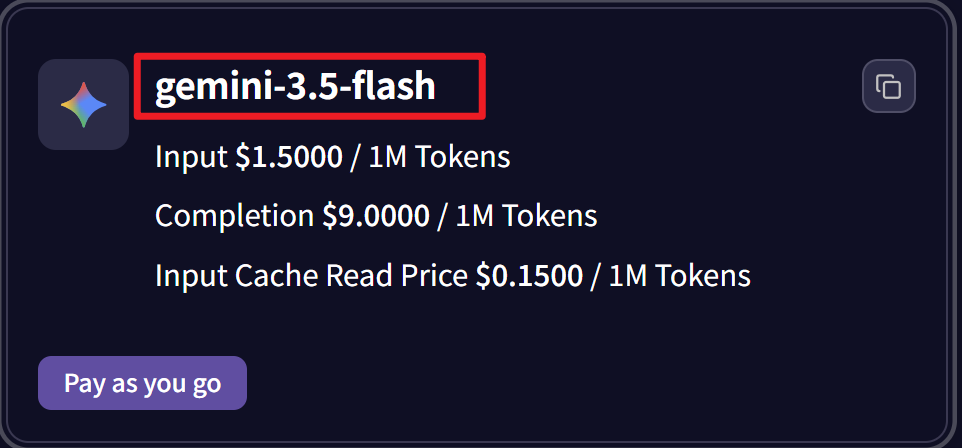
| モデル名 | 例: `gpt-5.5`、`gemini-3.5-flash` |
| APIエンドポイント | `https://api.mixroute.ai/v1` |
### ステップ4:パラメーターの設定
「モデルを追加」をクリックして設定します。
| 設定 | 値 |
| - | - |
| APIキー | Mixroute APIコンソールから取得 |
| モデル名 | 例: `gpt-5.5`、`gemini-3.5-flash` |
| APIエンドポイント | `https://api.mixroute.ai/v1` |
 「モデル名」と「APIエンドポイントのモデル名」のフィールドが一致していることを確認してください。
 ### ステップ5: 設定を保存する
「保存」をクリックして設定を完了します。
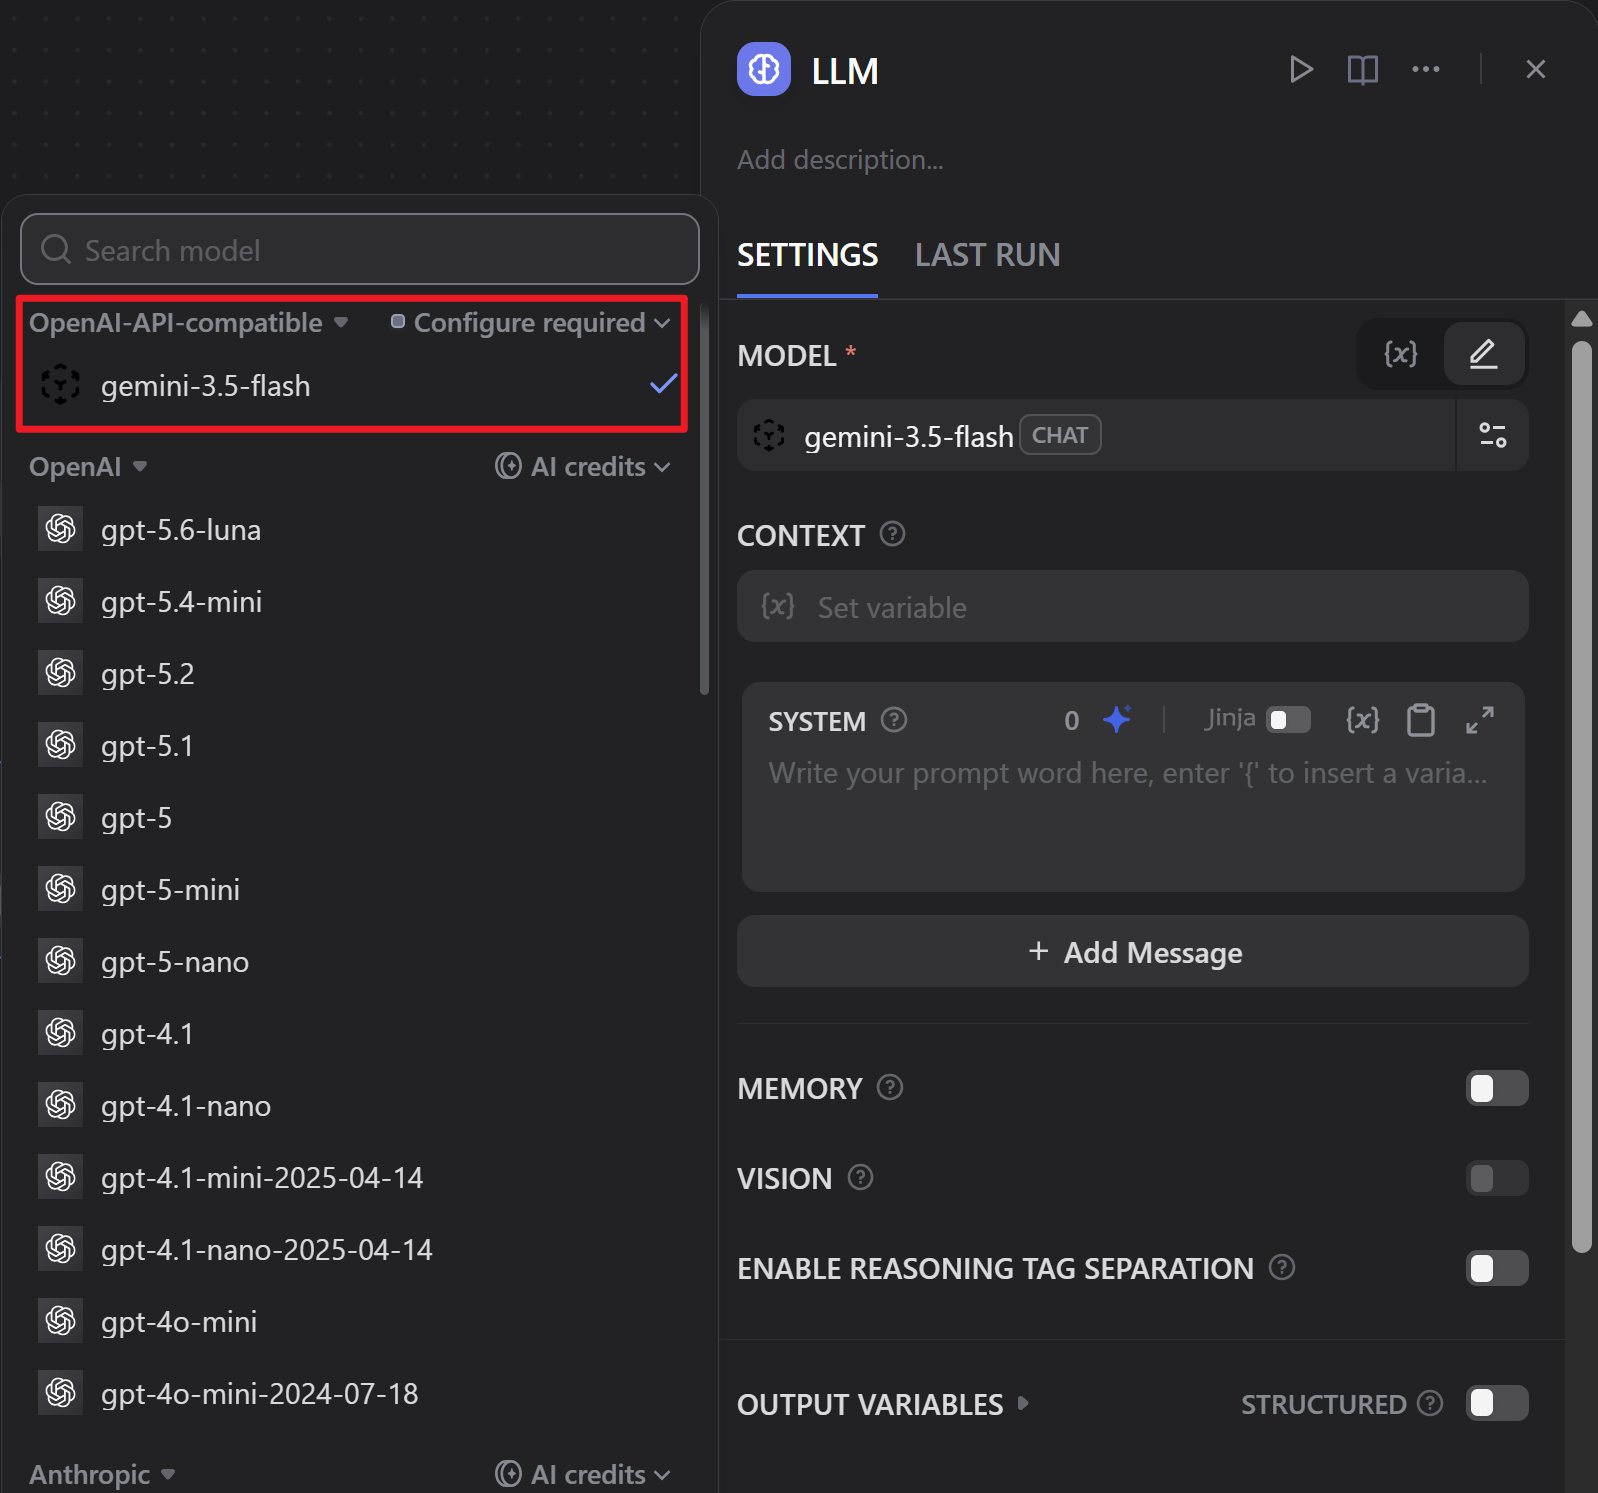
### ステップ6: 連携をテストする
1. 新しいワークフローまたはチャットボットを作成します
2. 先ほど設定したモデルを選択します
3. テストを実行し、すべて正常に動作することを確認します
### ステップ5: 設定を保存する
「保存」をクリックして設定を完了します。
### ステップ6: 連携をテストする
1. 新しいワークフローまたはチャットボットを作成します
2. 先ほど設定したモデルを選択します
3. テストを実行し、すべて正常に動作することを確認します
 ## 利点
競争力のある料金
同じ応答品質
簡単なプラグイン設定
チャット、埋め込み、音声文字起こし
This documentation is built and hosted on [Mintlify](https://mintlify.com), a developer documentation platform.
## 利点
競争力のある料金
同じ応答品質
簡単なプラグイン設定
チャット、埋め込み、音声文字起こし
This documentation is built and hosted on [Mintlify](https://mintlify.com), a developer documentation platform.