> ## Documentation Index
> Fetch the complete documentation index at: https://docs.mixroute.ai/llms.txt
> Use this file to discover all available pages before exploring further.
# スマートルーティング
## はじめに
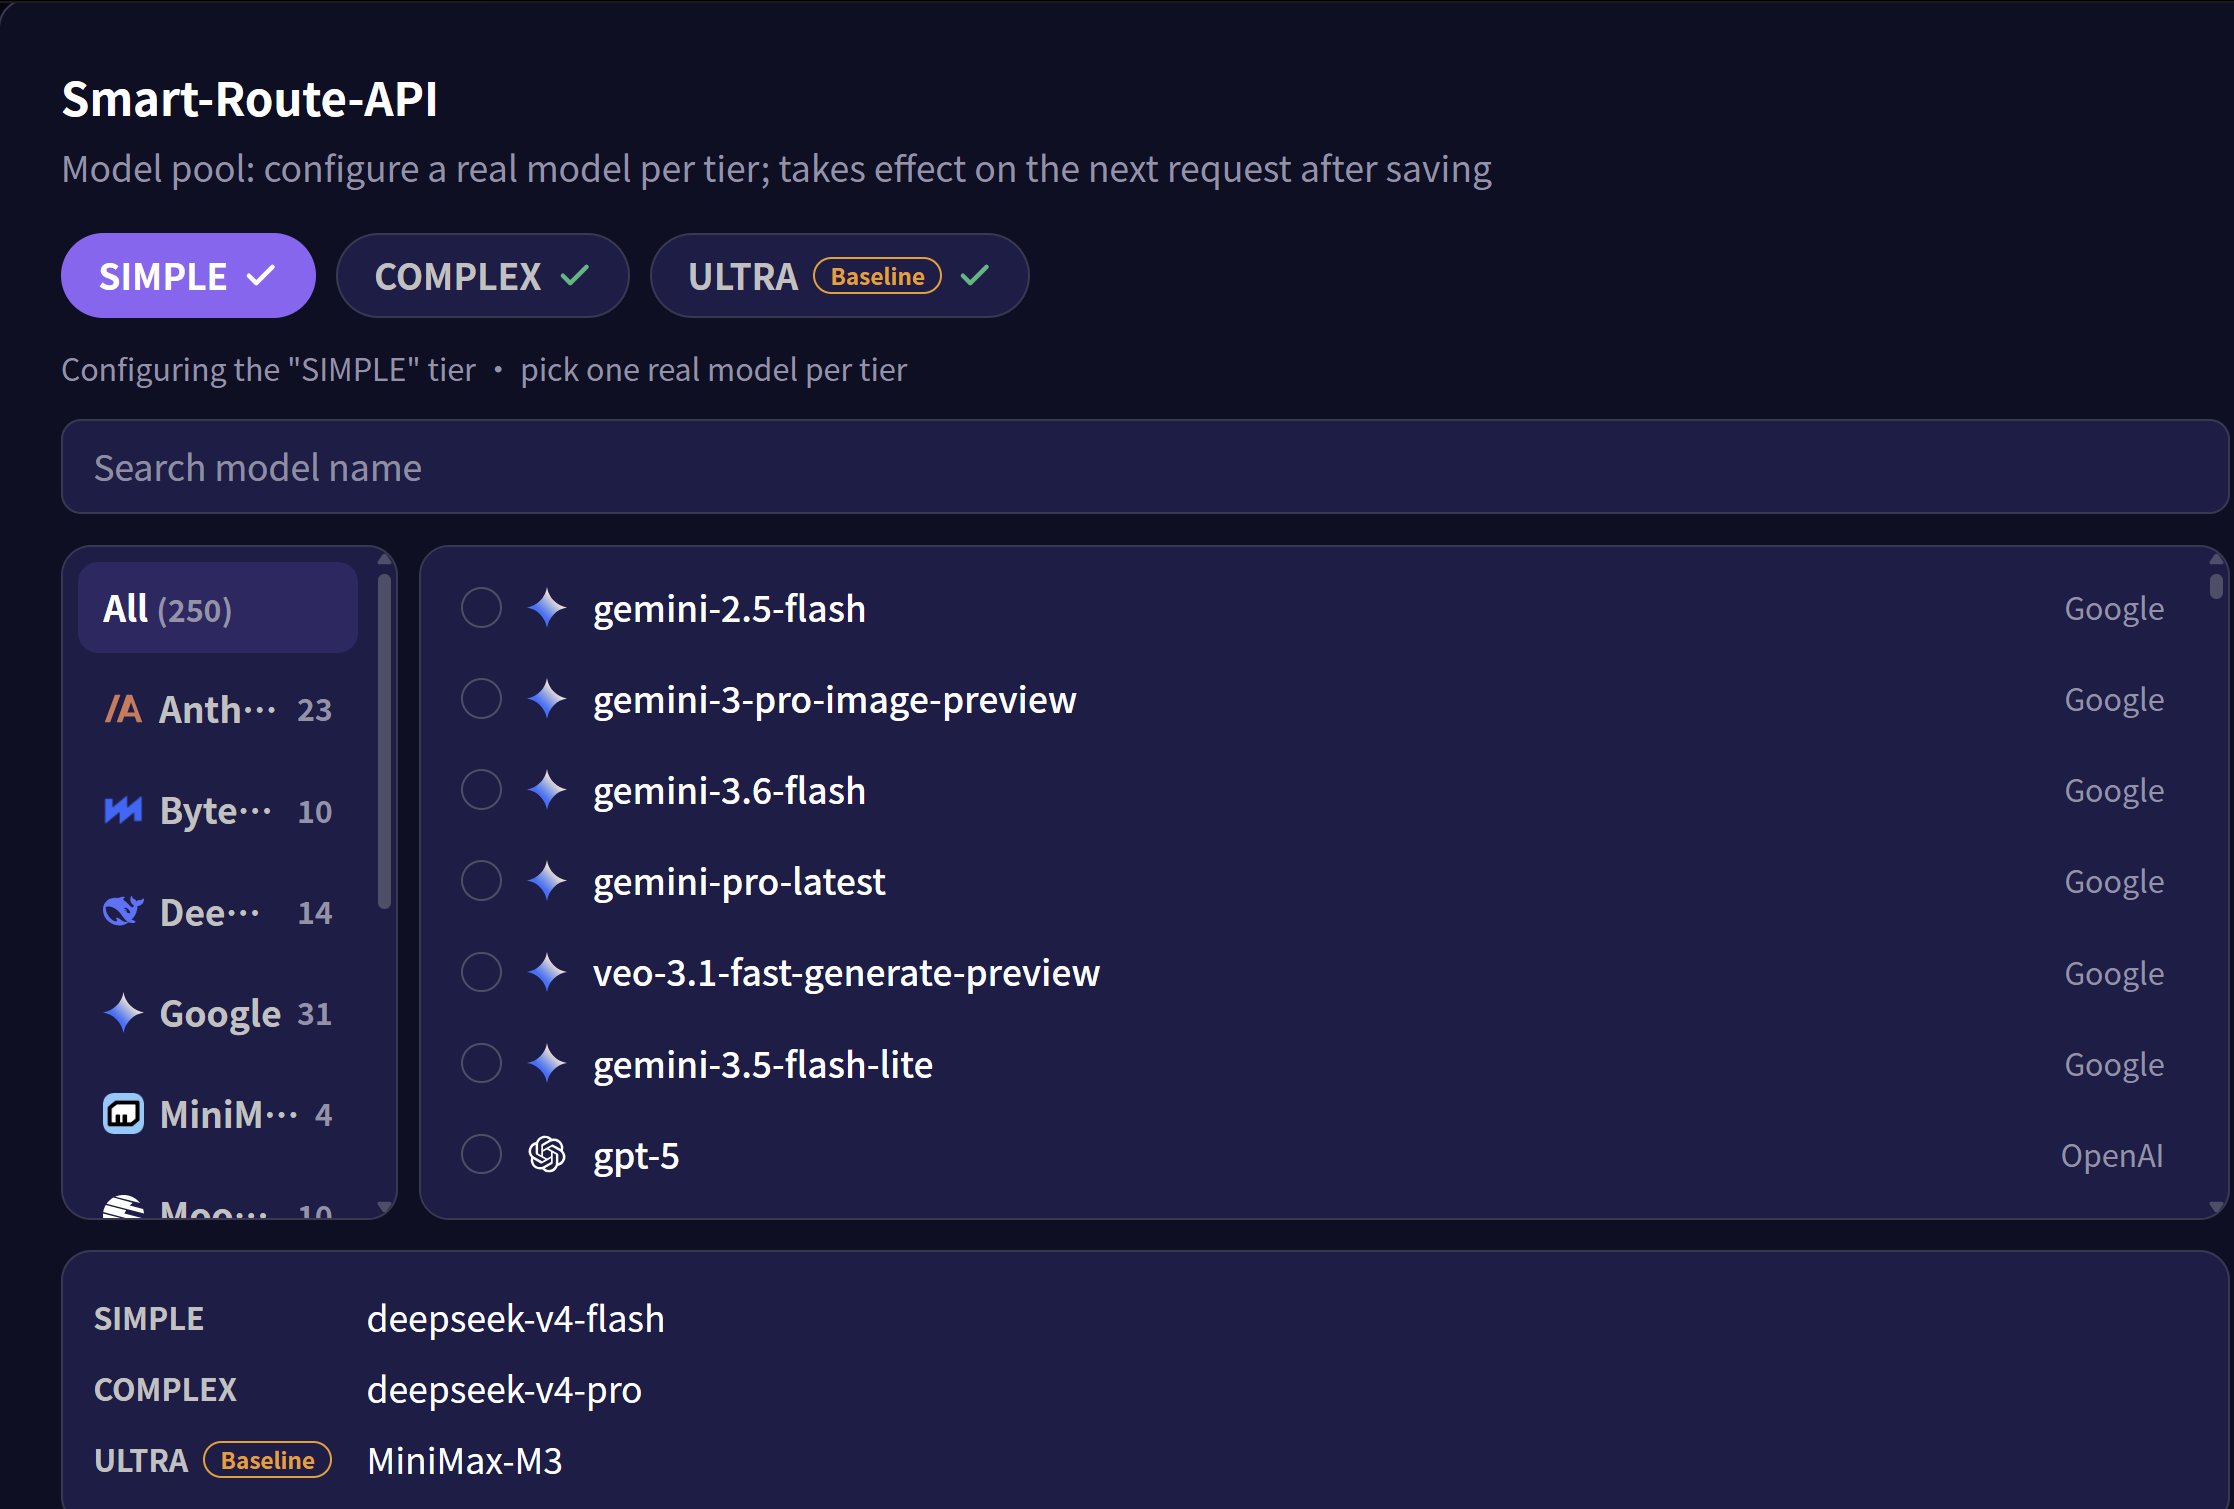
スマートルーティングは、タスクの複雑さに応じて各リクエストを自動的にモデルに割り当てます。コンソールには**Simple**、**Complex**、**Ultra**の3つの階層があり、出力品質を維持しながらAPIコストを削減します。Ultraが料金の基準です。
System APIでは、コンソールのUltraティアは`smart_route_tiers.super`に対応し、`smart_route_tiers`はJSONエンコードされた文字列として送信する必要があります。作成、更新、統計の全手順については、[スマートルーティングAPI](/ja/api-reference/system-api/smart-routing)を参照してください。
## アプリケーションのドキュメント
* [Hermes](/ja/integrations/Hermes)
* [Odysseus](/ja/integrations/odysseus)
* [Opencode](/ja/integrations/open-code)
* [OpenClaw](/ja/integrations/openclaw)
* [ClaudeCode](/ja/integrations/claude-code)
* [OpenWebUi](/ja/integrations/openwebui)
### 利用上の制約
**キャッシュ機能の制約**
プロンプトキャッシュは通常、プロバイダーとモデルごとに適用範囲が限定されます。スマートルーティングが後続のリクエストを別のモデルに送信した場合、そのリクエストでは前のモデルのキャッシュエントリを再利用できません。同じモデルにルーティングされたリクエストは、そのプロバイダーのルールに従ってキャッシュを利用できる場合があります。
**リクエストボディの構造上の制約**
スマートルーティングは`/v1/chat/completions`エンドポイントを使用します。ルーティング先がClaudeシリーズのモデルの場合、OpenAI互換モードでのみ動作します。互換モードでの機能上の制約については、Anthropicの公式ドキュメント「[OpenAI SDKの互換性](https://platform.claude.com/docs/en/cli-sdks-libraries/libraries/openai-sdk)」を参照してください。
### 利用ガイド
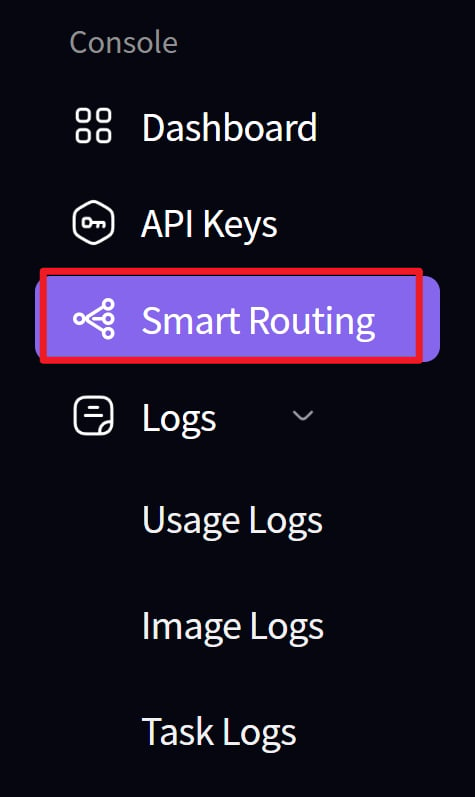
1. ルートを作成
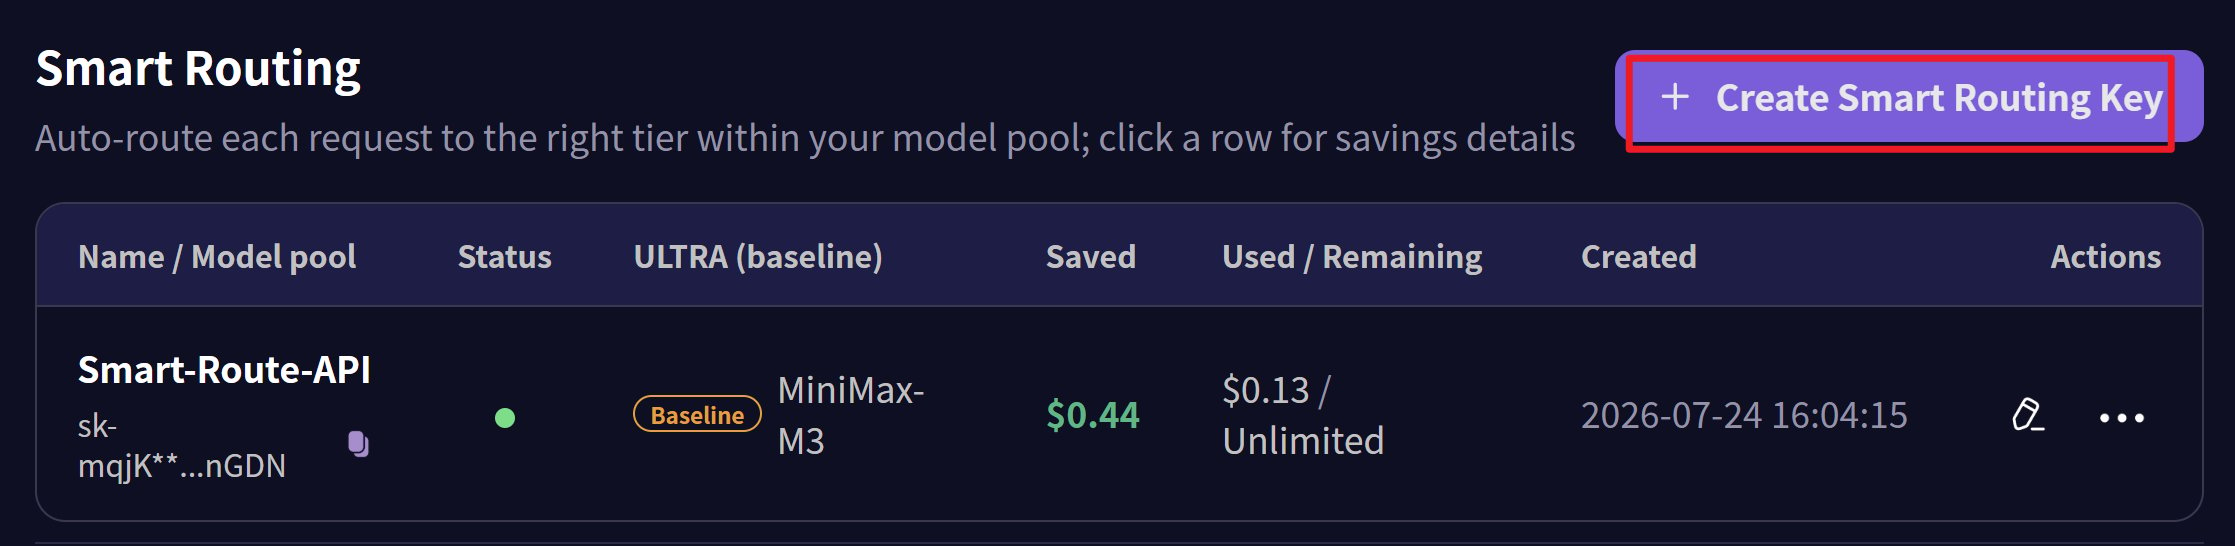
 2. ルートノード用のAPIキーを作成してください
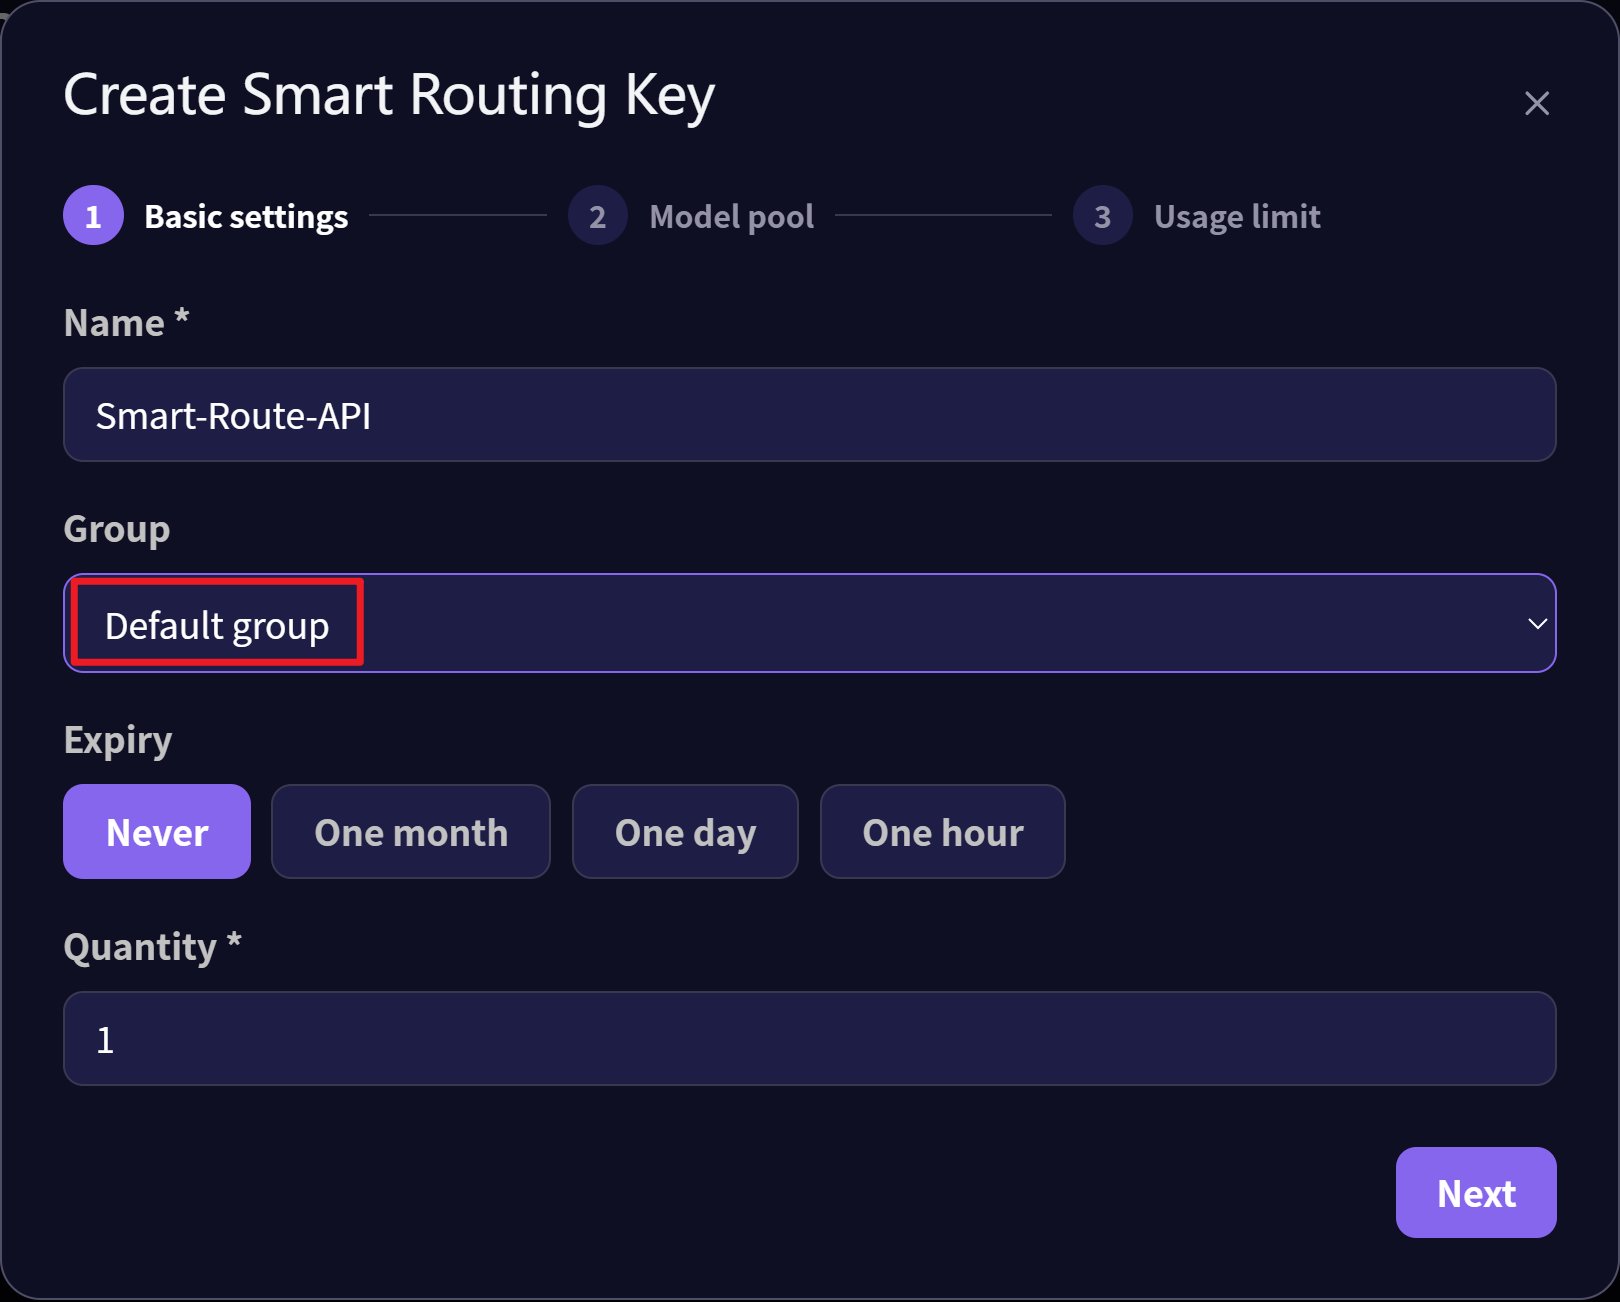
 3. APIキーのグループにDefaultを選択します
 4. simple、complex、ultraの3つのレベルに対応するモデルを設定してください
 5. スマートゲートウェイを設定し、ルーティングする
* 通信エンドポイント:`https://api.mixroute.ai/v1/chat/completions`
* モデル名:`auto`
* APIキー: ルートのAPIキーを使用してください
```bash theme={null}
curl https://api.mixroute.ai/v1/chat/completions \
-H "Content-Type: application/json" \
-H "Authorization: Bearer YOUR_ROUTING_KEY" \
-d '{
"model": "auto",
"messages": [
{"role": "user", "content": "Hello"}
]
}'
```
This documentation is built and hosted on [Mintlify](https://mintlify.com), a developer documentation platform.
5. スマートゲートウェイを設定し、ルーティングする
* 通信エンドポイント:`https://api.mixroute.ai/v1/chat/completions`
* モデル名:`auto`
* APIキー: ルートのAPIキーを使用してください
```bash theme={null}
curl https://api.mixroute.ai/v1/chat/completions \
-H "Content-Type: application/json" \
-H "Authorization: Bearer YOUR_ROUTING_KEY" \
-d '{
"model": "auto",
"messages": [
{"role": "user", "content": "Hello"}
]
}'
```
This documentation is built and hosted on [Mintlify](https://mintlify.com), a developer documentation platform.