> ## Documentation Index
> Fetch the complete documentation index at: https://docs.mixroute.ai/llms.txt
> Use this file to discover all available pages before exploring further.
# Odysseus
> How to deploy the Odysseus Agent and connect to Mixroute via Custom Endpoints to power your self-hosted AI workspace.
Odysseus is a self-hosted AI workspace designed to provide a privatized Web experience similar to ChatGPT and Claude. It not only supports local models but also seamlessly integrates with cloud APIs (such as Mixroute), featuring powerful Agent routing, Deep Research, collaborative document editing, persistent memory (ChromaDB), and an evolving skill system.
* Official GitHub: [pewdiepie-archdaemon/odysseus](https://github.com/pewdiepie-archdaemon/odysseus)
## Core Features
Built-in autonomous Agents based on tool calling, web search, file read/write, and Shell execution, supporting MCP service extensions.
Multi-step, autonomous academic and factual search, synthesis, and extraction, ultimately outputting comprehensive, high-quality visual reports.
Equipped with a rich-text Markdown editor where AI can collaboratively edit documents based on context, perfectly optimized for mobile devices.
## Prerequisites
Before starting deployment, please ensure your system meets the following requirements:
**Smart Routing** is an intelligent model routing capability that automatically distributes requests to the most suitable model based on task complexity, reducing API costs while enhancing efficiency.
1. Obtain your Mixroute API endpoint URL, typically: `https://api.mixroute.ai/v1`
2. Generate your Smart Routing node Key in the Mixroute [Smart Routing](https://console.mixroute.ai/smart-route) page.
3. Select models for different task levels. See [Smart Routing Guide](/en/smart-routing) for constraints and usage guide.
Configuration example:
```text theme={null}
API Key :
API Host : https://api.mixroute.ai/v1
Models: auto
```
1. Obtain your Mixroute API endpoint URL, typically: `https://api.mixroute.ai/v1`
2. Generate your API Key in the Mixroute console.
3. Determine the model name you want to use, e.g., `claude-sonnet-5` (make sure this model is enabled in the Mixroute console).
Configuration example:
```text theme={null}
API Key :
API Host : https://api.mixroute.ai/v1
Models: claude-sonnet-5
```
* **Docker Deployment**: Requires Docker and Docker Compose.
* **Native Linux Deployment**: Requires Python 3.11 or higher, and ensure `git` is installed on your system.
## Deploying Odysseus
You can choose between the recommended Docker containerized deployment or native Linux deployment based on your system configuration.
Launch Odysseus and its companion services (ChromaDB, SearXNG, etc.) with a single command via Docker Compose. All data is persisted in the local `data/` directory.
```bash theme={null}
# Clone the repository and enter the workspace directory
git clone https://github.com/pewdiepie-archdaemon/odysseus.git
cd odysseus
# Create and configure the environment file (optional, to modify ports or bind addresses)
cp .env.example .env
# Start the services
docker compose up -d --build
```
If you want optional PDF rendering and Office document extraction support (requires AGPL PyMuPDF), perform a manual build with the build argument before running `up`:
```bash theme={null}
docker compose build --build-arg INSTALL_OPTIONAL=true
docker compose up -d
```
If you prefer to deploy directly on your host machine (physical or virtual machine), please refer to the following guide:
```bash theme={null}
# Clone and enter the directory
git clone https://github.com/pewdiepie-archdaemon/odysseus.git
cd odysseus
# Create and activate a Python virtual environment (Python 3.11+)
python3 -m venv venv
source venv/bin/activate
# Install dependencies
pip install -r requirements.txt
# Run the setup script
python setup.py
# Start the application (bound to 127.0.0.1, port 7000)
python -m uvicorn app:app --host 127.0.0.1 --port 7000
```
Native deployment requires ensuring that essential system dependencies (such as `sqlite3`) are installed. If you wish to use Odysseus's Cookbook feature to download or manage background services, installing `tmux` is highly recommended.
## First Login & Password Retrieval
By default, Odysseus automatically creates an admin account `admin` during the first startup and prints the generated random initial password to the startup logs.
Run the following command in your terminal to view the output:
* **Docker Deployment**:
```bash theme={null}
docker compose logs odysseus | grep -C3 'password'
```
* **Native Linux Deployment**: Check the temporary initial password output in `uvicorn` or your startup terminal.
Log in using the username `admin` and the password you just retrieved.
* Local access: `http://127.0.0.1:7000`
* Remote cloud server access: `http://:7000`
By default, the container only listens to 127.0.0.1. If you need to configure a cloud virtual machine, please refer to the Nntwork errors or container listening issues below.
## Configuring Mixroute
Once logged in successfully, follow these steps to configure Mixroute as a custom endpoint to power your Odysseus intelligent assistant.
Click **Settings** in the bottom-left corner to access the global system settings.
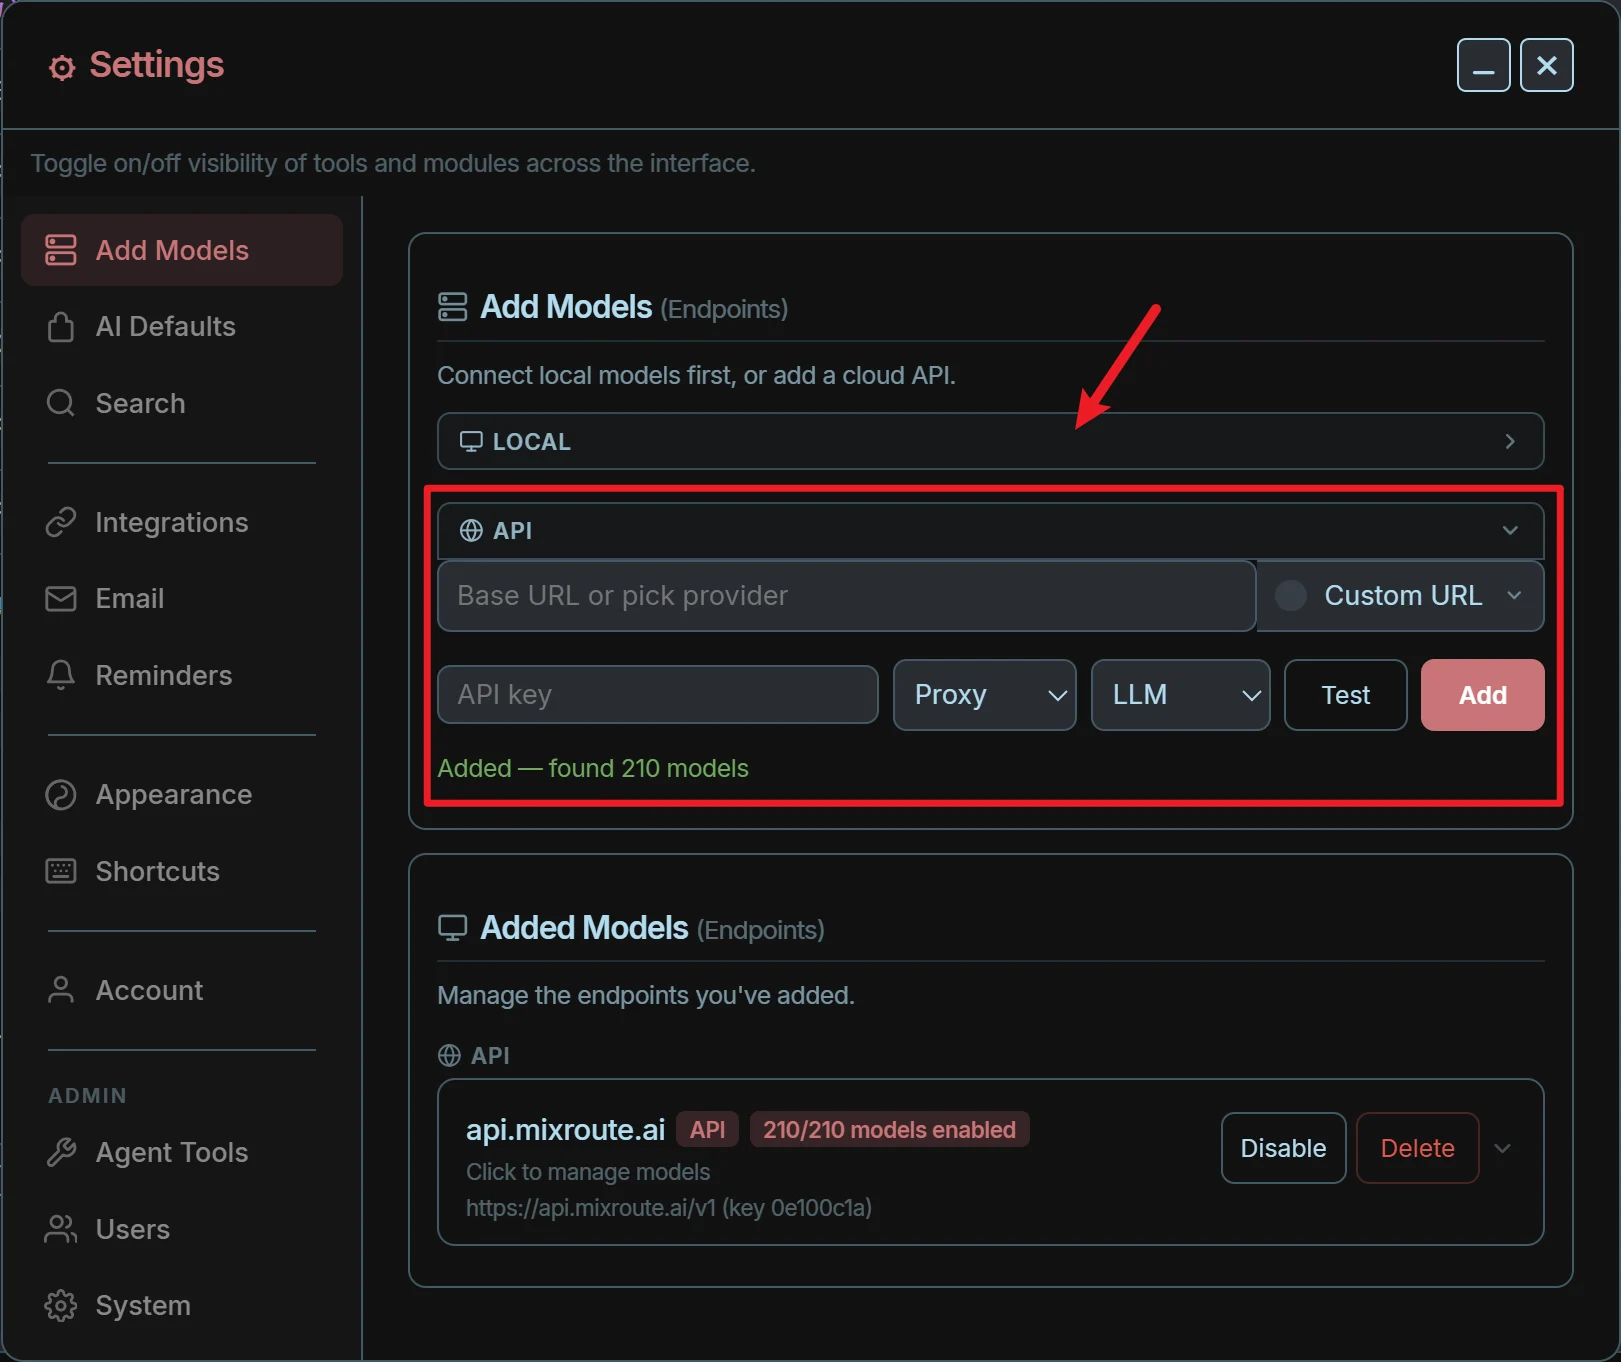
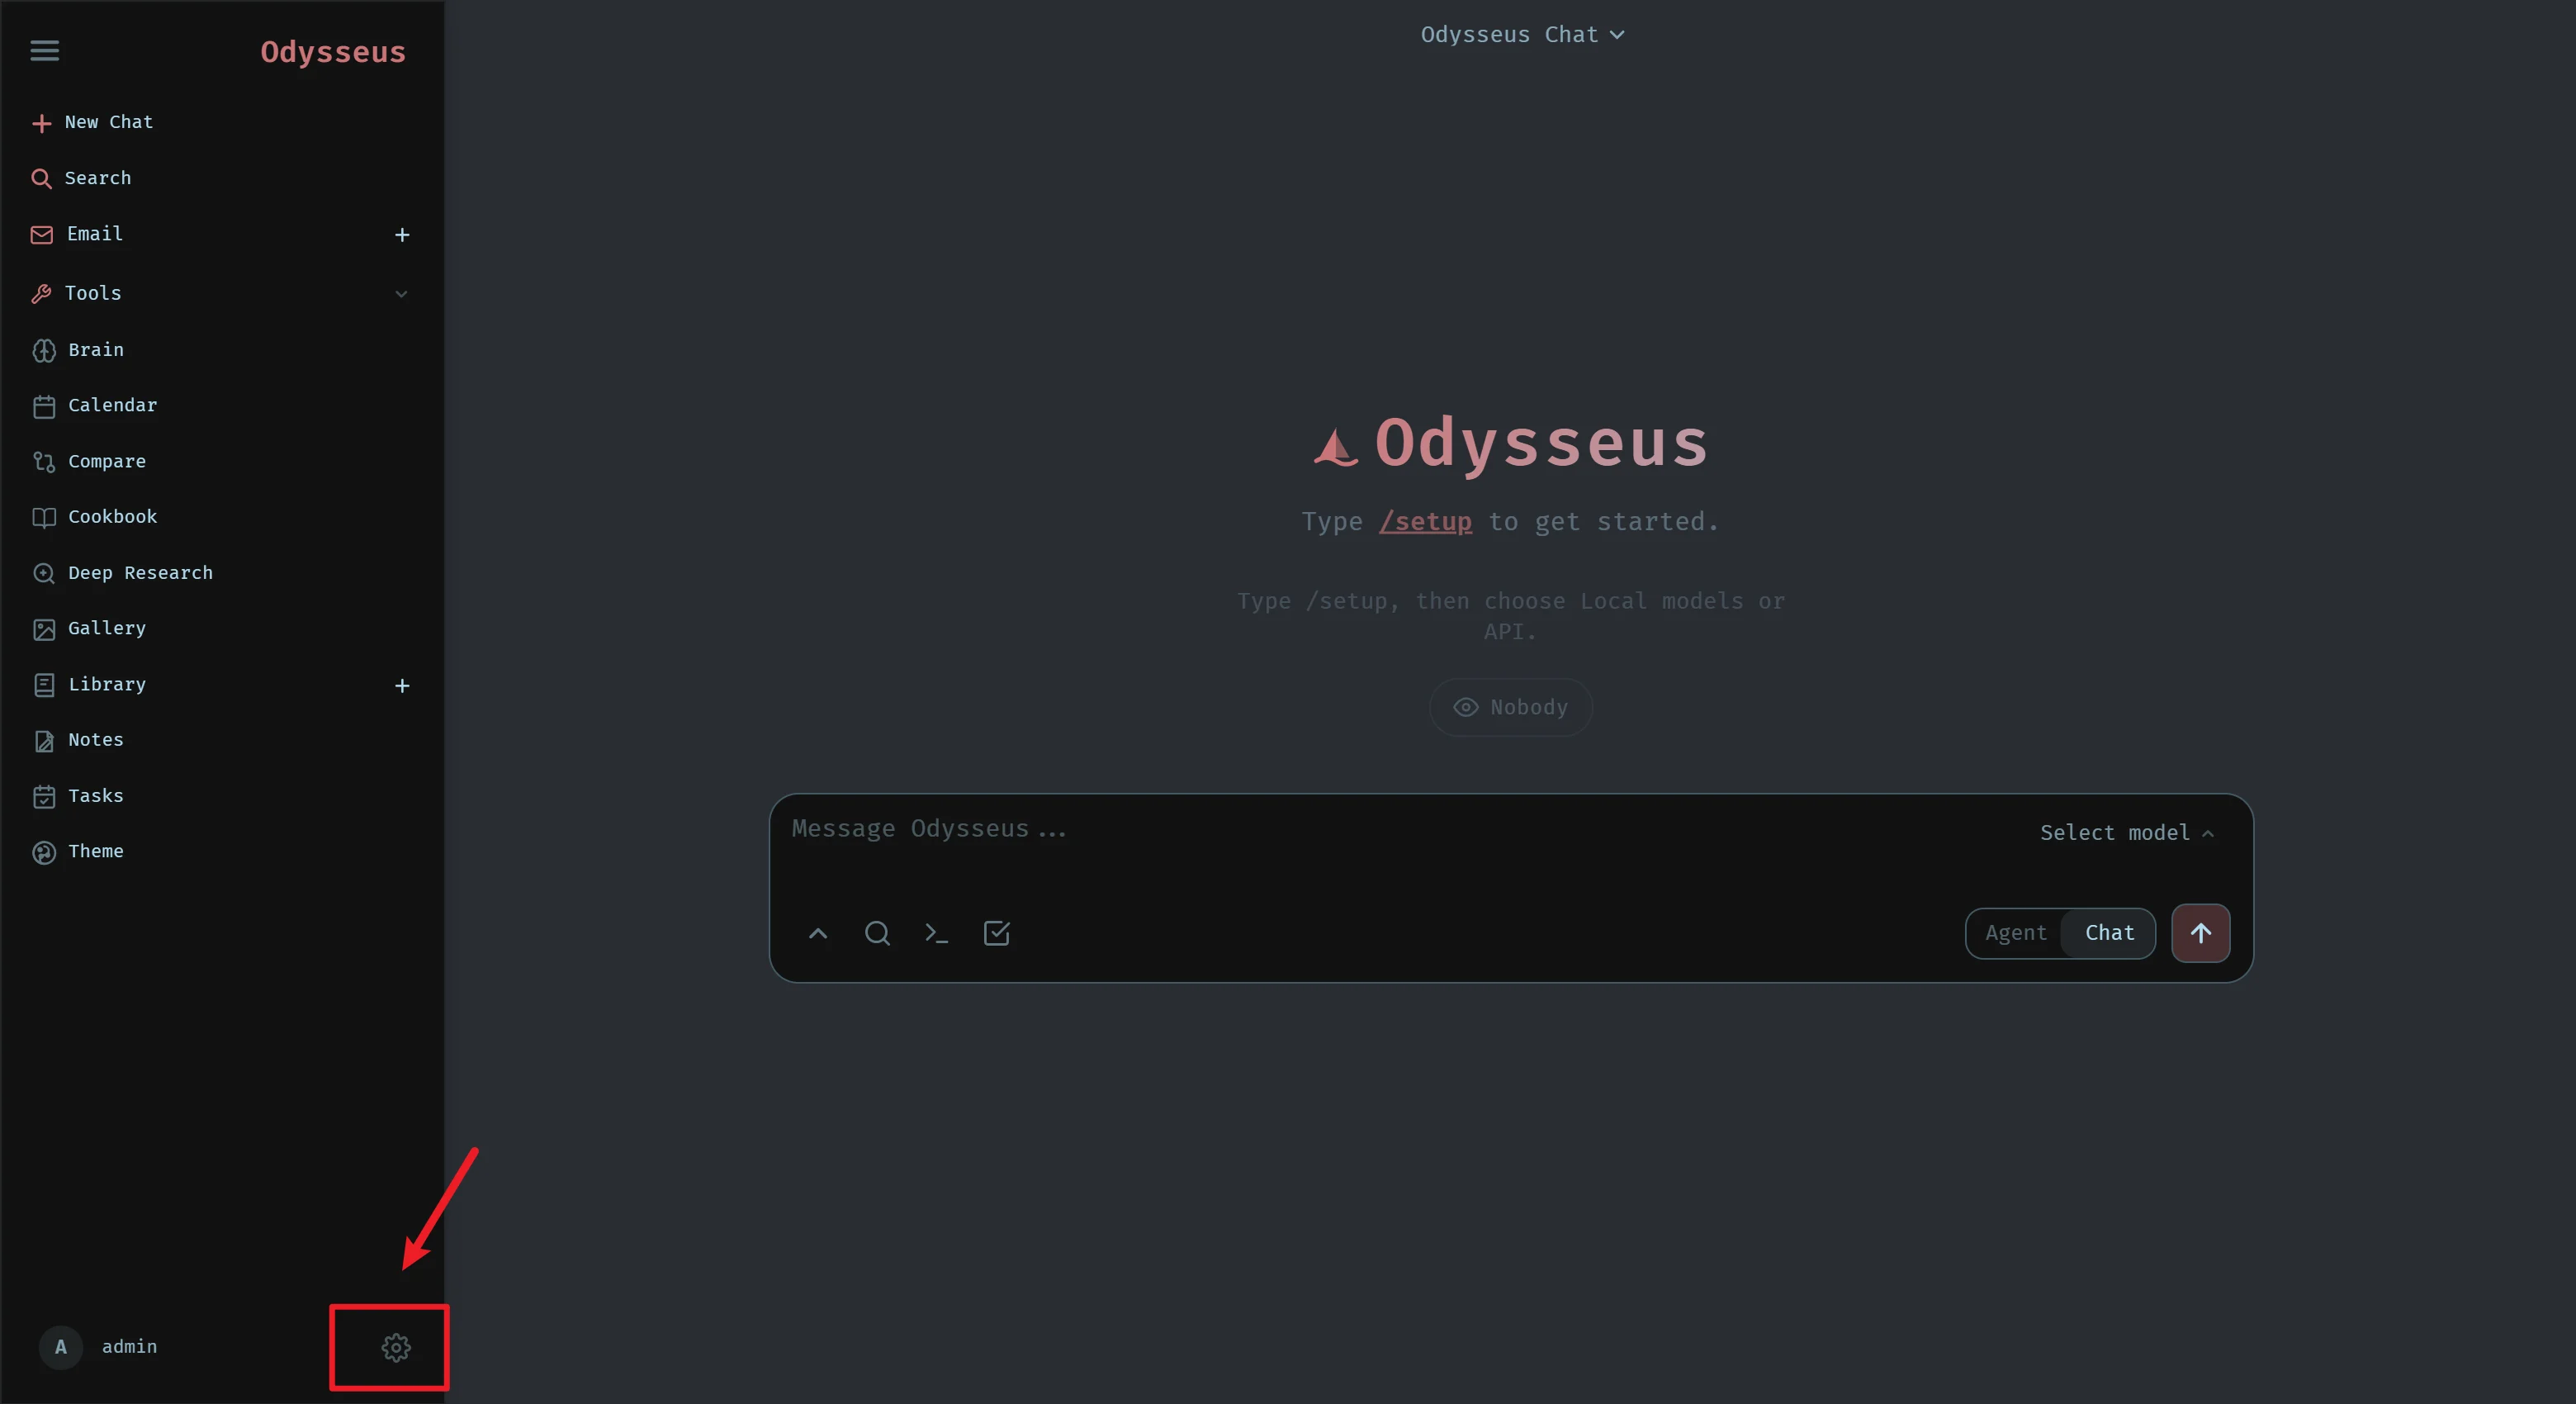 Add a new custom endpoint on the Providers/Endpoints page in **Settings**:
* **Base URL**: `https://api.mixroute.ai/v1`
* **API Key**: Enter your Mixroute API Key (e.g., `sk-xxxxxxxx`)
Add a new custom endpoint on the Providers/Endpoints page in **Settings**:
* **Base URL**: `https://api.mixroute.ai/v1`
* **API Key**: Enter your Mixroute API Key (e.g., `sk-xxxxxxxx`)
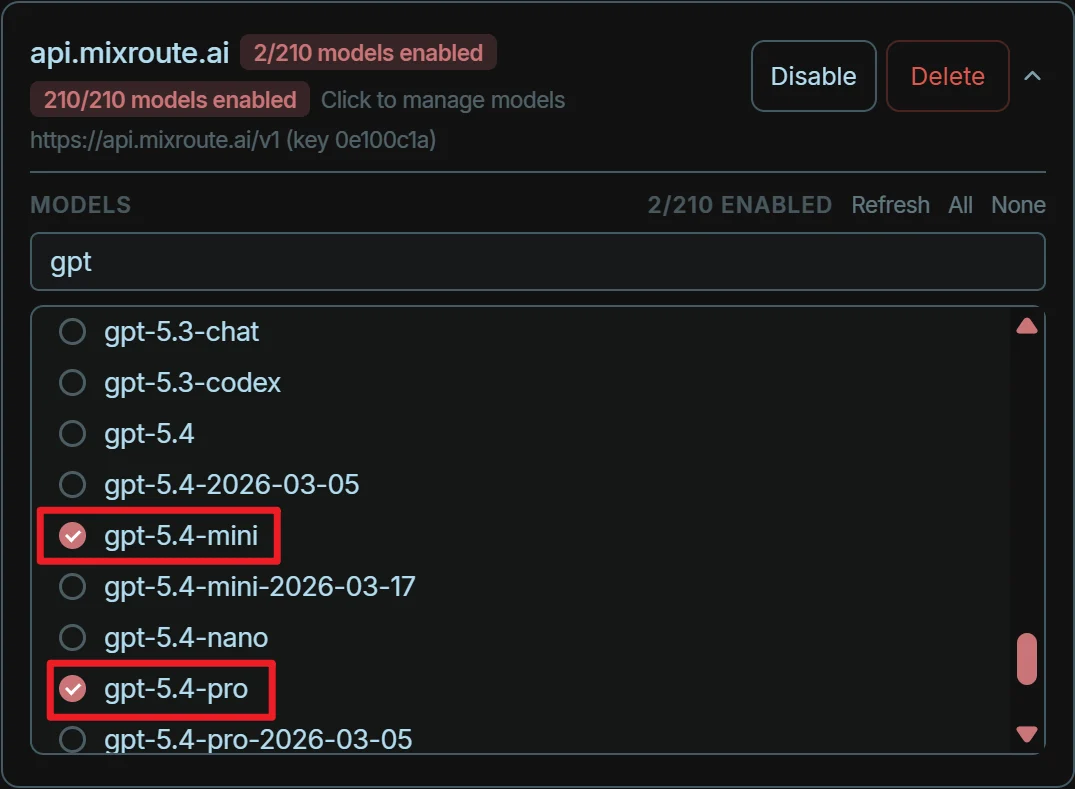
 After adding the endpoint, Odysseus will automatically probe and load the available models returned by that endpoint. You can enable frequently used models in the list, or assign them to global default roles (such as default chat, Deep Research, Task scheduling, vision, etc.).
Testing shows that the GPT series performs exceptionally well in Odysseus; using it in conjunction with GPT models is highly recommended.
After adding the endpoint, Odysseus will automatically probe and load the available models returned by that endpoint. You can enable frequently used models in the list, or assign them to global default roles (such as default chat, Deep Research, Task scheduling, vision, etc.).
Testing shows that the GPT series performs exceptionally well in Odysseus; using it in conjunction with GPT models is highly recommended.
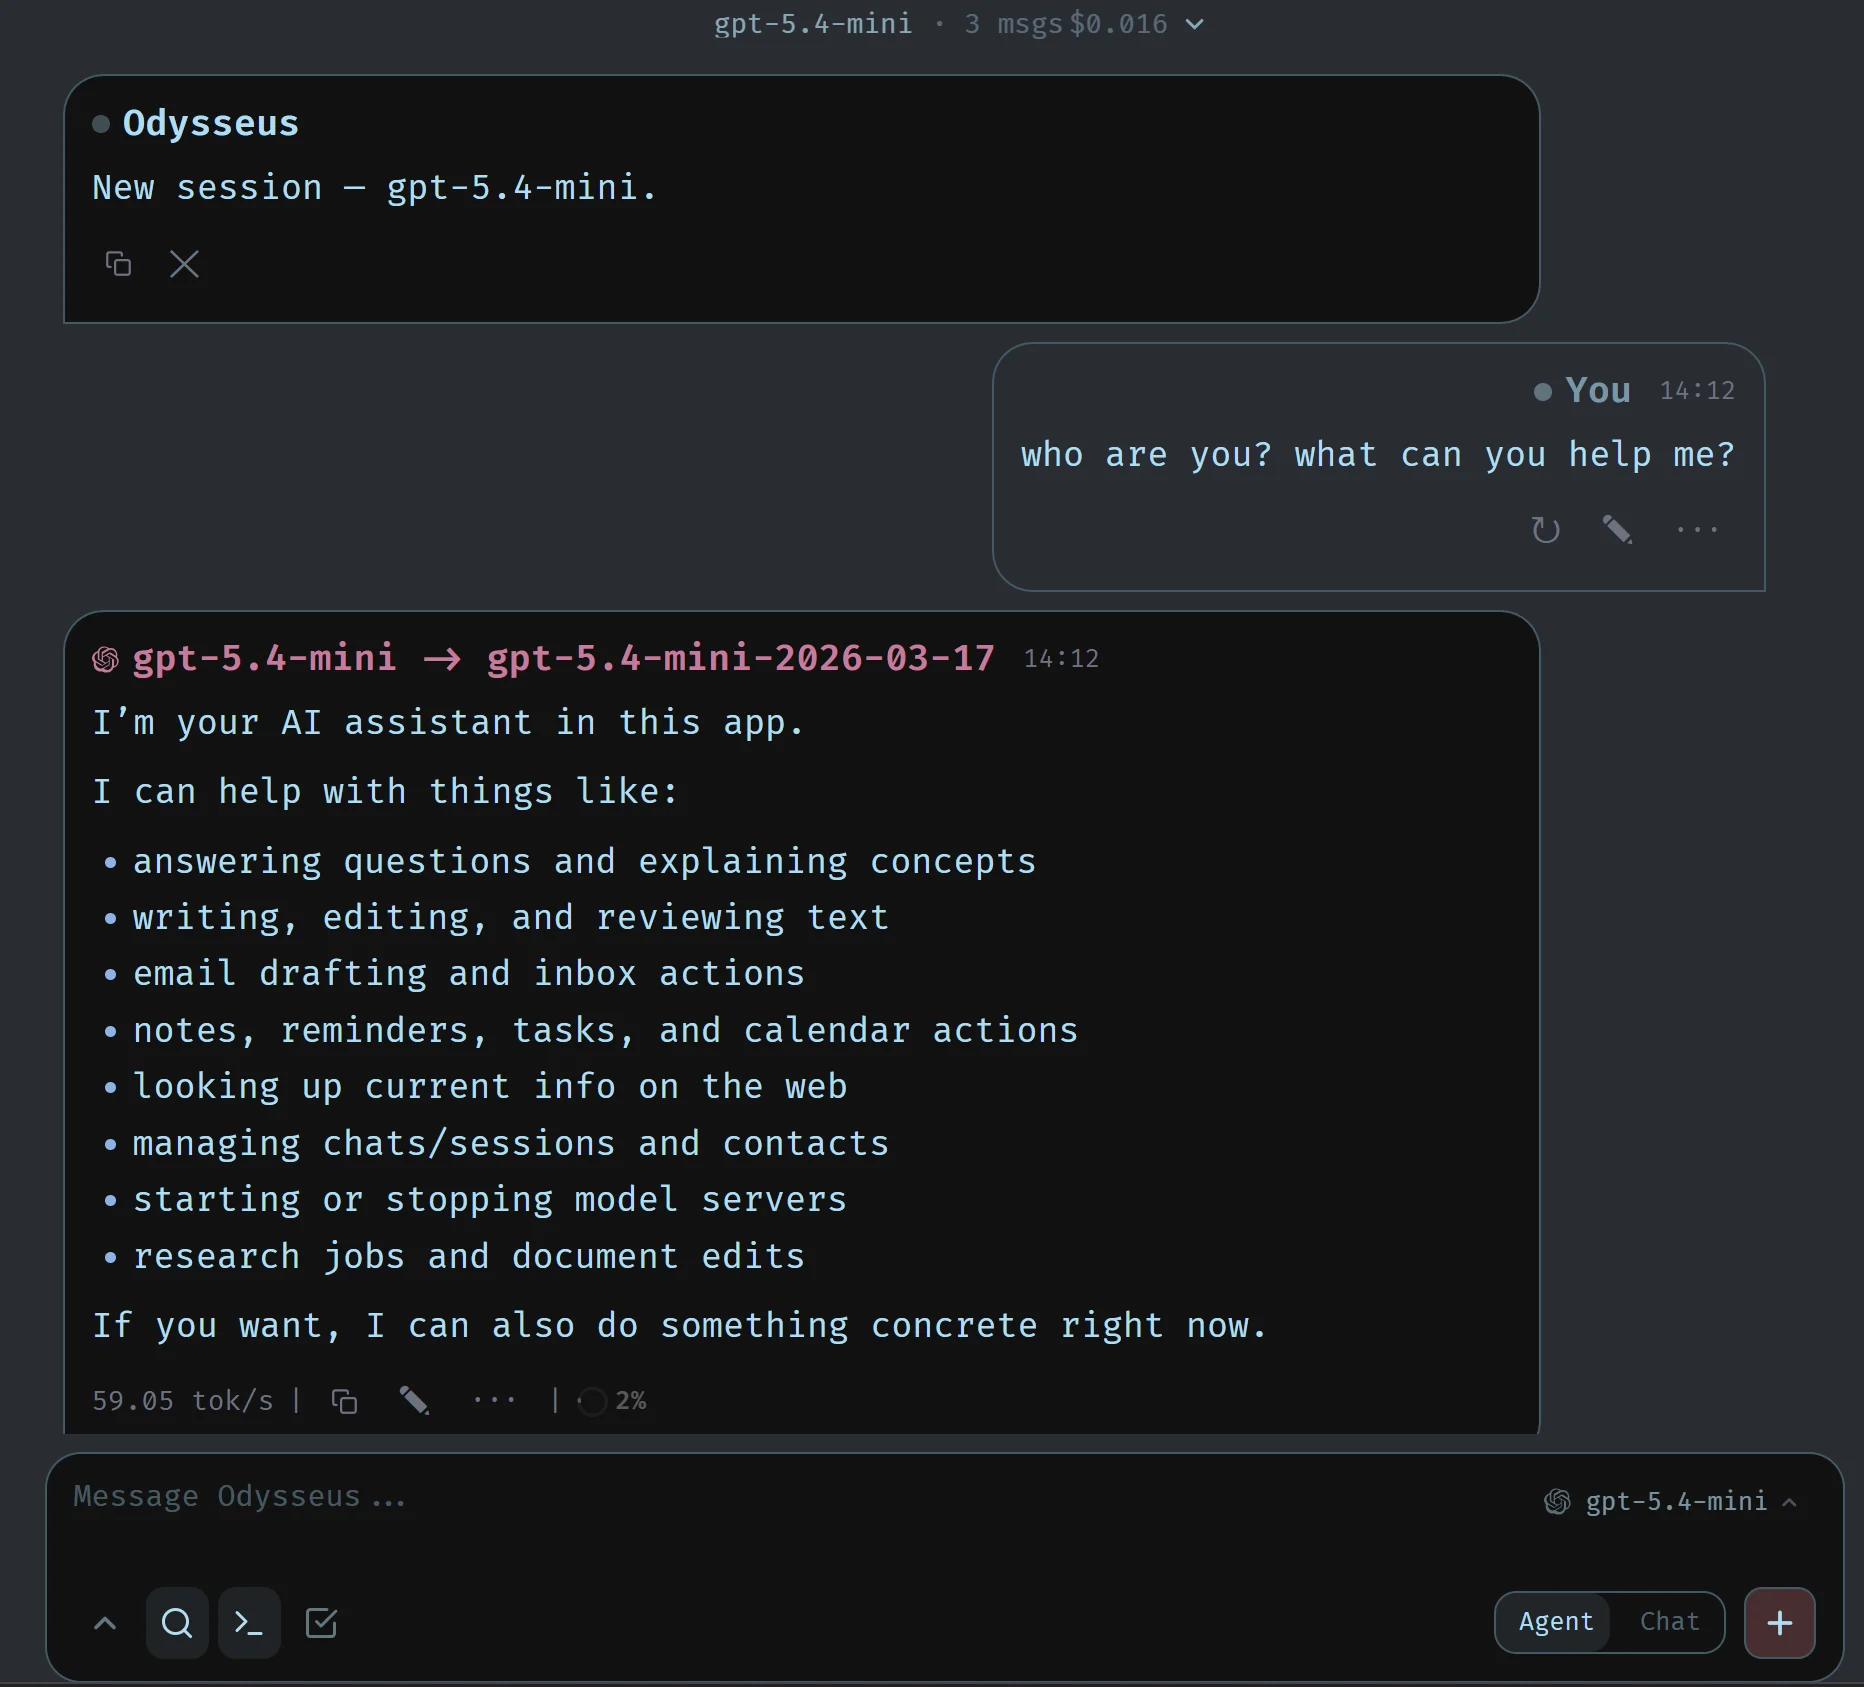
 Return to the Chat home page to start conversations and launch powerful intelligent Agents utilizing Mixroute's underlying models.
 ## FAQ & Advanced Setup
If you need to call or manage local GPUs through the Cookbook inside self-hosted containers, we recommend:
1. Running the built-in diagnostic and configuration script:
```bash theme={null}
scripts/check-docker-gpu.sh --install-nvidia-toolkit --enable-nvidia-overlay
```
2. This script automatically appends `COMPOSE_FILE=docker-compose.yml:docker/gpu.nvidia.yml` to `.env` to enable NVIDIA Container Toolkit mapping.
By default, the container only listens on `127.0.0.1`.
* If you need direct access via IP over LAN or the public network, please modify `APP_BIND=0.0.0.0` in `.env` and restart the container.
* For production environments, it is highly recommended to keep the listening address on `127.0.0.1` and use Nginx, Caddy, or Cloudflare Tunnel as a reverse proxy with an SSL certificate.
If you encounter issues where ChromaDB fails to load or experiences client incompatibilities:
```bash theme={null}
# We recommend manually uninstalling potentially conflicting lightweight clients, then force-reinstalling the full package:
./venv/bin/pip uninstall chromadb-client -y
./venv/bin/pip install --force-reinstall chromadb
```
Once configured, all of Odysseus's subsequent features (Deep Research, file retrieval, calendar/todos, and email triage) will be powered by the Mixroute endpoint bound and configured in your Settings, delivering a robust and highly cost-effective cloud-based LLM experience.
## FAQ & Advanced Setup
If you need to call or manage local GPUs through the Cookbook inside self-hosted containers, we recommend:
1. Running the built-in diagnostic and configuration script:
```bash theme={null}
scripts/check-docker-gpu.sh --install-nvidia-toolkit --enable-nvidia-overlay
```
2. This script automatically appends `COMPOSE_FILE=docker-compose.yml:docker/gpu.nvidia.yml` to `.env` to enable NVIDIA Container Toolkit mapping.
By default, the container only listens on `127.0.0.1`.
* If you need direct access via IP over LAN or the public network, please modify `APP_BIND=0.0.0.0` in `.env` and restart the container.
* For production environments, it is highly recommended to keep the listening address on `127.0.0.1` and use Nginx, Caddy, or Cloudflare Tunnel as a reverse proxy with an SSL certificate.
If you encounter issues where ChromaDB fails to load or experiences client incompatibilities:
```bash theme={null}
# We recommend manually uninstalling potentially conflicting lightweight clients, then force-reinstalling the full package:
./venv/bin/pip uninstall chromadb-client -y
./venv/bin/pip install --force-reinstall chromadb
```
Once configured, all of Odysseus's subsequent features (Deep Research, file retrieval, calendar/todos, and email triage) will be powered by the Mixroute endpoint bound and configured in your Settings, delivering a robust and highly cost-effective cloud-based LLM experience.