> ## Documentation Index
> Fetch the complete documentation index at: https://docs.mixroute.ai/llms.txt
> Use this file to discover all available pages before exploring further.
# LobeHub
> Using MixRoute API Key in LobeHub
## Use MixRoute API in LobeHub
This guide shows how to use **MixRoute API** (OpenAI-compatible) in LobeHub instead of the official OpenAI key.
## Step 1: Get a MixRoute API Key
1. Sign up for a [MixRoute account](https://api.mixroute.ai/) and complete basic setup.
2. In the console, go to the **API Keys** page and click `Create new key`.
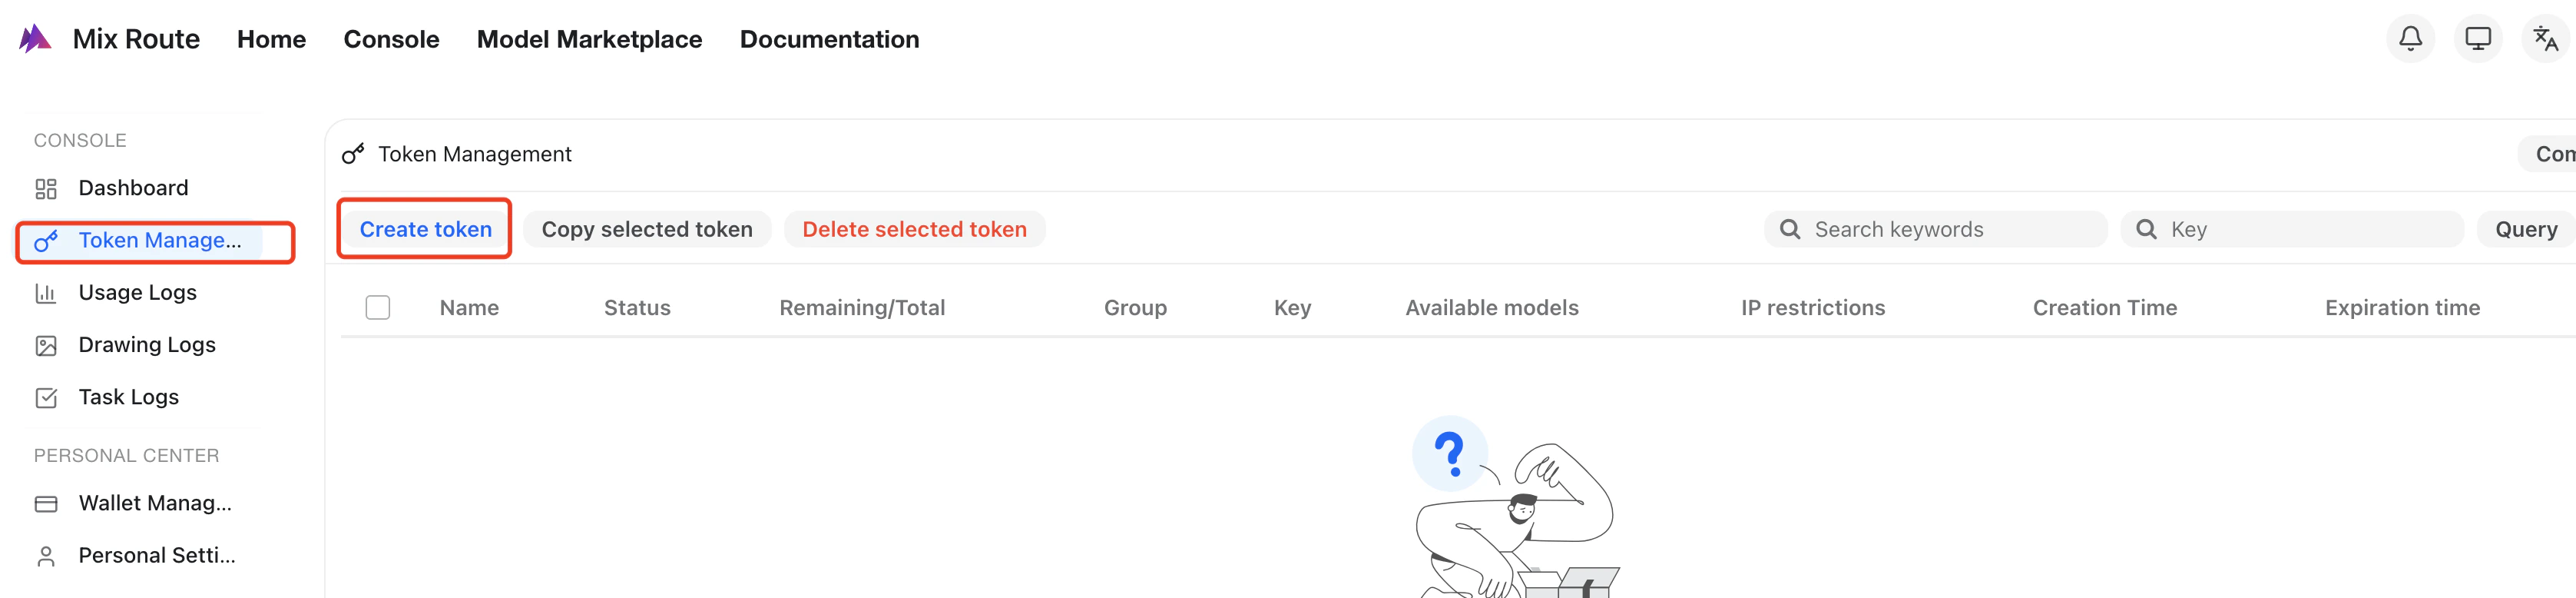 3. Enter a name for the key in the popup dialog and create it:
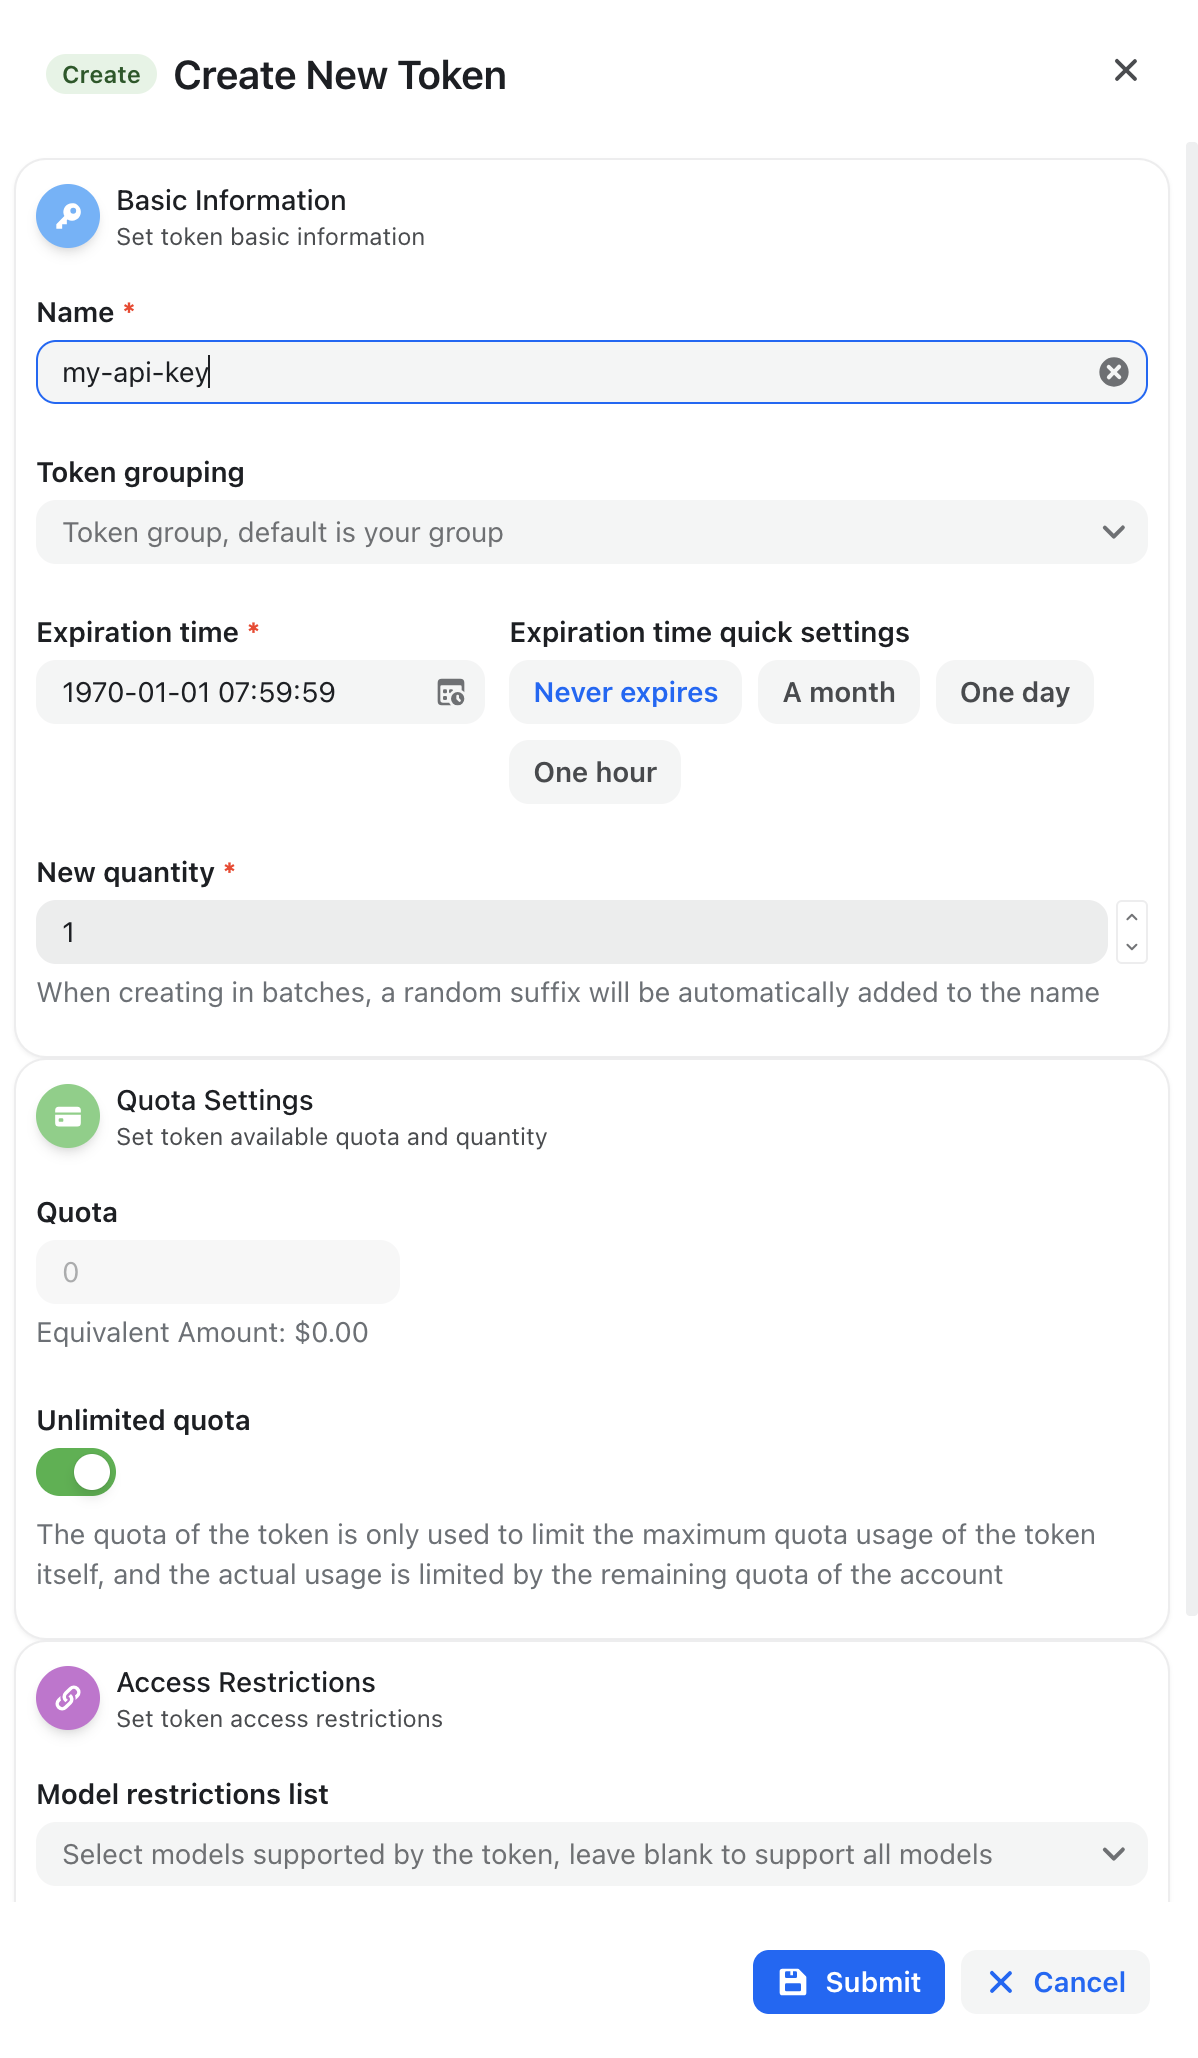 4. Copy the generated API key and store it securely:
 For security reasons, the full key is usually shown only once. If you lose it, generate a new key in the console.
## Step 2: Configure MixRoute in LobeHub
1. Open LobeHub and go to the **Settings** page.
2. Under **AI Providers**, find the **OpenAI / custom OpenAI-compatible provider** section.
3. In the provider configuration, fill in:
For security reasons, the full key is usually shown only once. If you lose it, generate a new key in the console.
## Step 2: Configure MixRoute in LobeHub
1. Open LobeHub and go to the **Settings** page.
2. Under **AI Providers**, find the **OpenAI / custom OpenAI-compatible provider** section.
3. In the provider configuration, fill in:
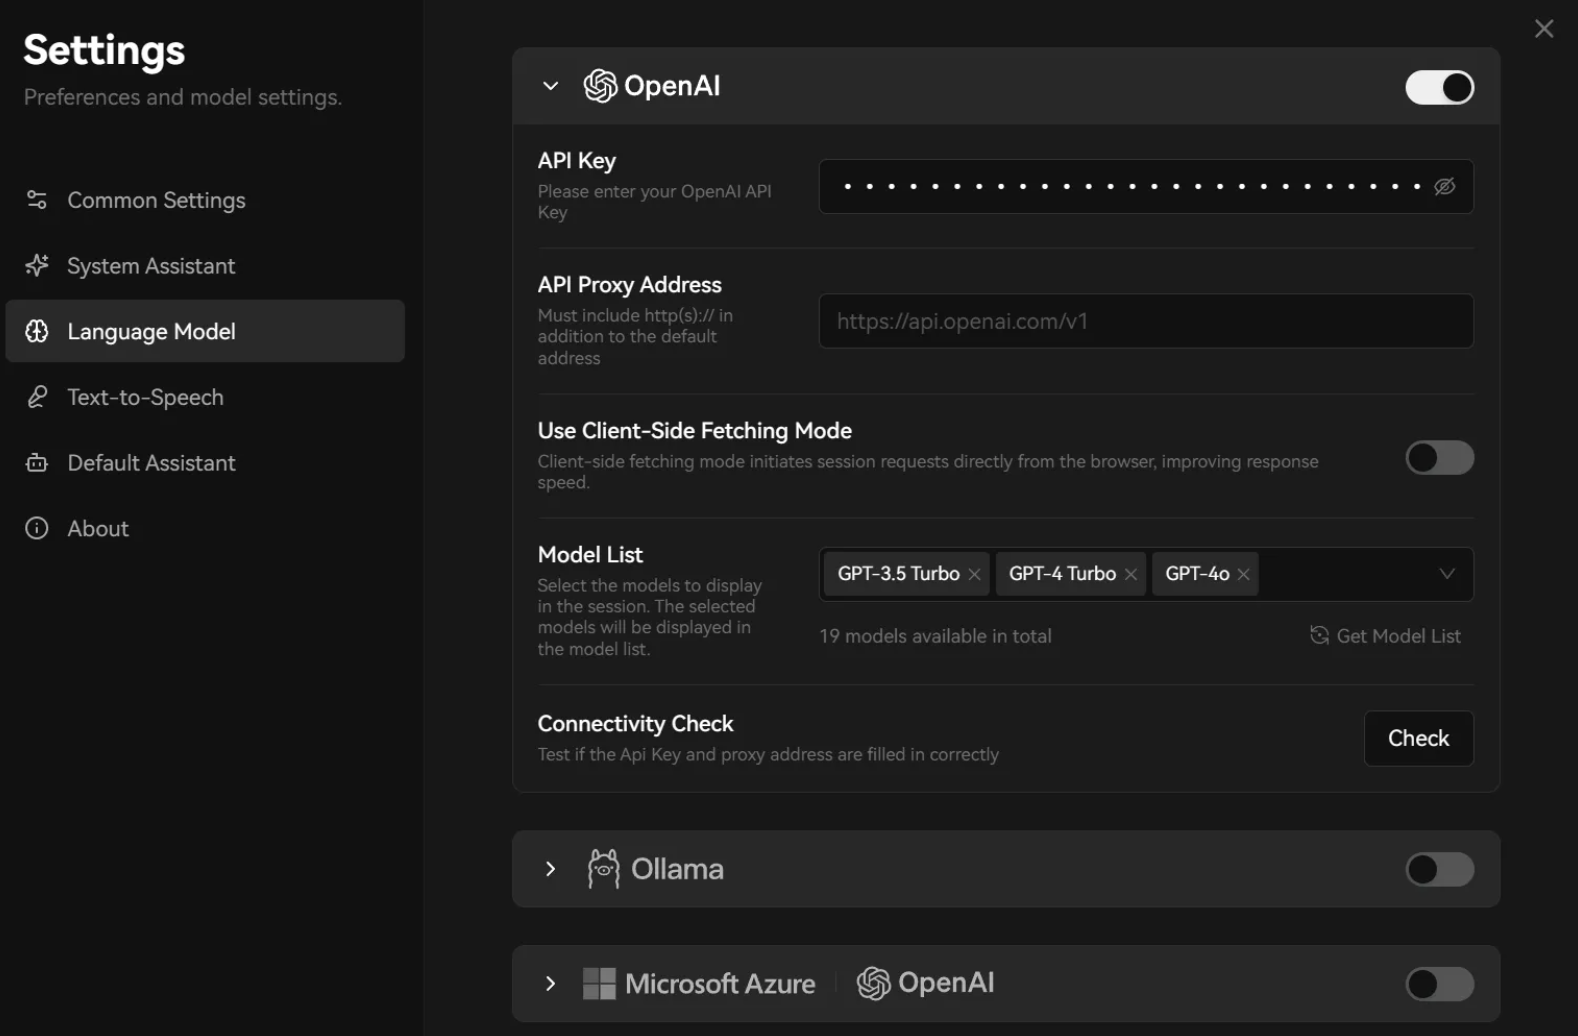 In the provider configuration, fill in:
| Field | Value |
| -------------------------- | -------------------------------------------------- |
| API Key | Paste the API key copied from the MixRoute console |
| Base URL / Custom endpoint | `https://api.mixroute.ai/v1` |
4. Save the configuration, then select a model provided by MixRoute from the model list and start chatting.
In the provider configuration, fill in:
| Field | Value |
| -------------------------- | -------------------------------------------------- |
| API Key | Paste the API key copied from the MixRoute console |
| Base URL / Custom endpoint | `https://api.mixroute.ai/v1` |
4. Save the configuration, then select a model provided by MixRoute from the model list and start chatting.
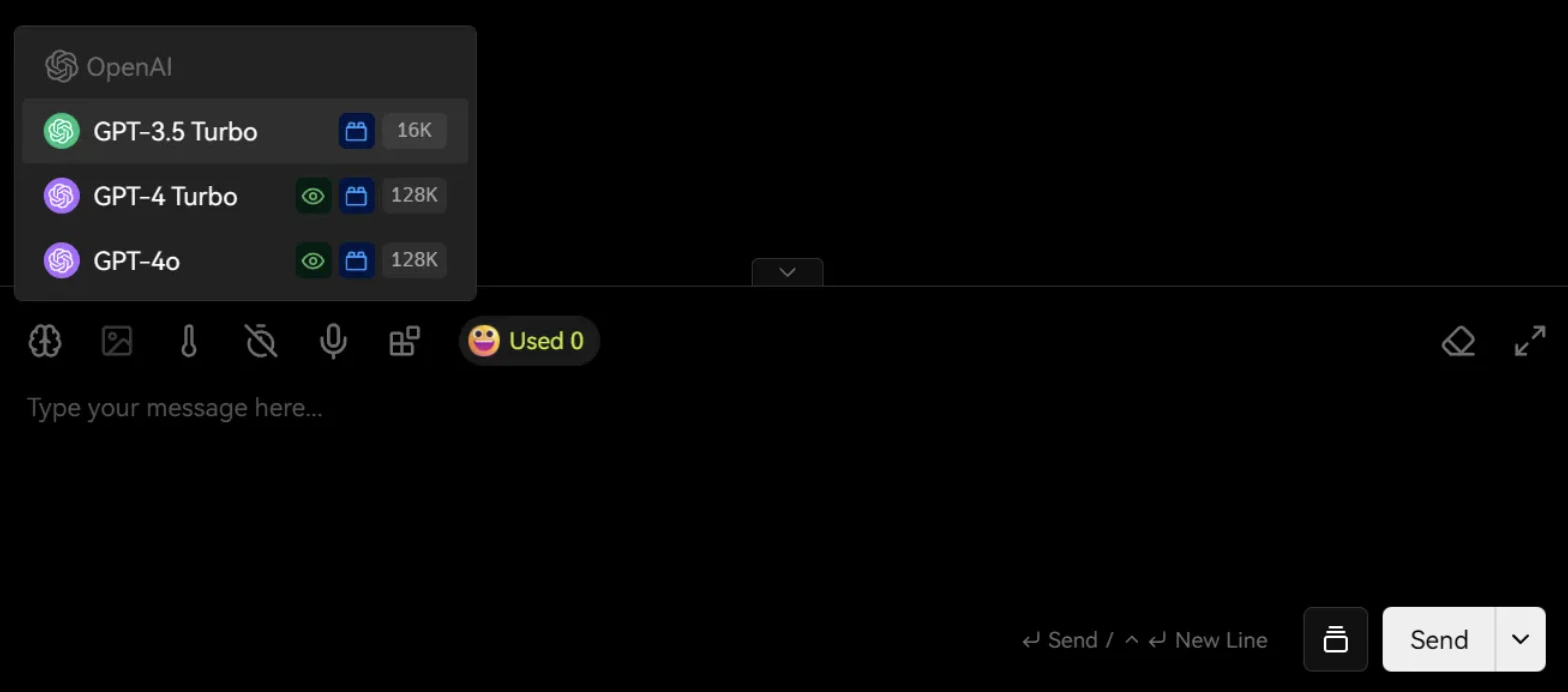 Usage is billed based on the models you call. Please refer to pricing and usage information in the MixRoute console.
For a full list of models and prices, see the [Model List](https://console.mixroute.ai/models).
Usage is billed based on the models you call. Please refer to pricing and usage information in the MixRoute console.
For a full list of models and prices, see the [Model List](https://console.mixroute.ai/models).